Getting your first site up and running in Laravel Forge

This is a series of posts on Laravel Forge.
!Warning: This post is over a year old. I don't always update old posts with new information, so some of this information may be out of date.
If you're here, you've likely already heard about Taylor Otwell's announcement at Laracon about Homestead and Forge.
For an interview with Taylor, the story of how Taylor released hints and puzzles to the community before Laracon, and for a little bit about why Forge is great, check out Adam Engebretson's post Laravel Forge - How Taylor Just Saved Us Hours of Work.
What is Forge and how can I use it today?
Here, we'll be focusing mainly on the gritty details of Forge. What does it do? How? How can I use it today?
Homestead is a way to develop your Laravel sites locally that provides a consistent environment that's in line with Taylor's preferred development stack: Nginx, MySQL/PostgreSQL, Beanstalk, Redis, Memcached, and PHP 5.5 (at the moment.) Homestead is a pre-configured Vagrant box that matches the stack provided by Forge. Learn more about Homestead here.
Forge is a way to host your Laravel sites on a consistent, predictable, and flexible environment. It's a PAAS (platform as a service) that manages and simplifies the deployment of your code to Digital Ocean, Linode, Amazon EC2, or Rackspace, including creating a remote hosting environment with feature parity to Homestead so your dev and prod environments can be as close as possible. If you're familiar with FortRabbit, Heroku, or EngineYard Cloud, Forge is similar to those--but it's also pretty unique in a few ways.
So! Let's walk through the steps to getting your first Laravel app deployed on Forge.
Sign up
Sign up for Forge. Simple enough.
Authenticate Github
In order to give Forge access to your sites' codebases, you want to visit the Dashboard to give Forge permission to access your Github account.
You will be able to manually SSH into your sites at any point, but the automated code deployment features--and there are quite a few of them--all depend on Github.
Also, every new server will automatically be authenticated to your Github account via an SSH key, so even if you deploy manually, Forge's Github connection will make it simpler and smoother.
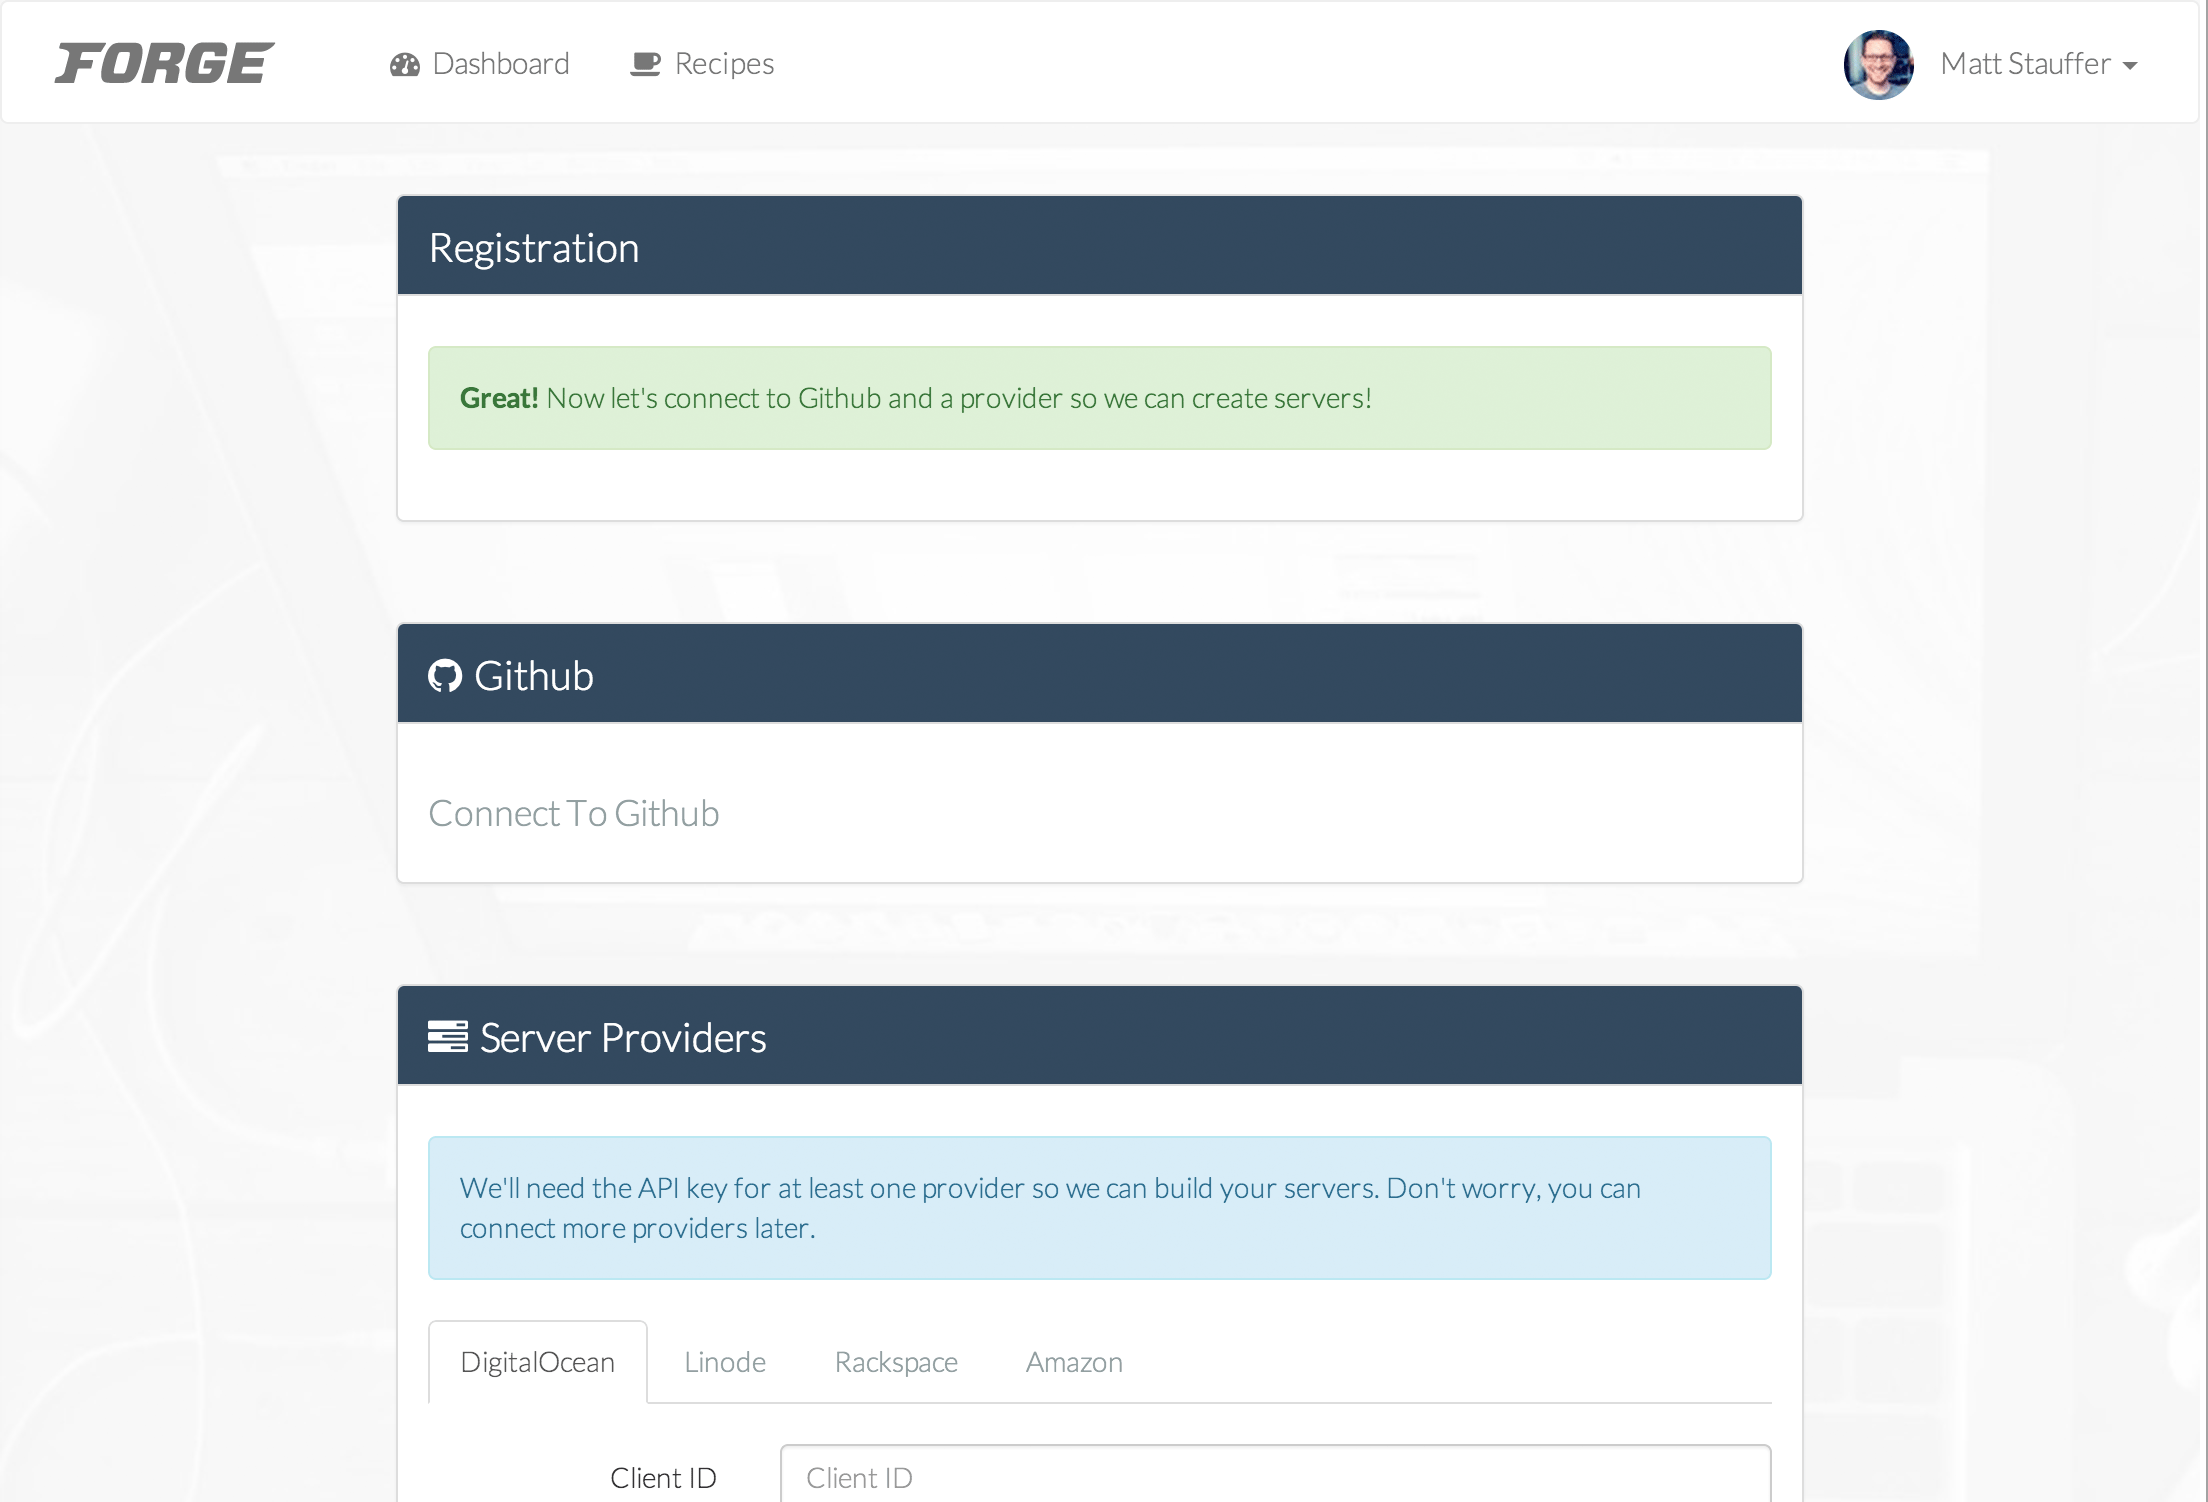
Authenticate with a cloud provider
On the servers page you'll find the first option is to create a new server. Now is a good time to talk about the distinction between the various hosts.
The four hosts you can use with Forge (DigitalOcean, Linode, Rackspace, and Amazon) all allow the user (or a service like Forge acting in your stead) to configure the settings for a virtual machine that will run your web site. In creating Homestead and Forge, Taylor has created a single "preferred" environment for Laravel, and allowed you (via Homestead) to develop locally using it and (via Forge) to deploy to any of these four services.
So, the environment will be the same no matter which server you use. If you don't have an account with any of the four servers, DigitalOcean is easy and user-friendly, and if you sign up with this link I get a referral bonus. :)
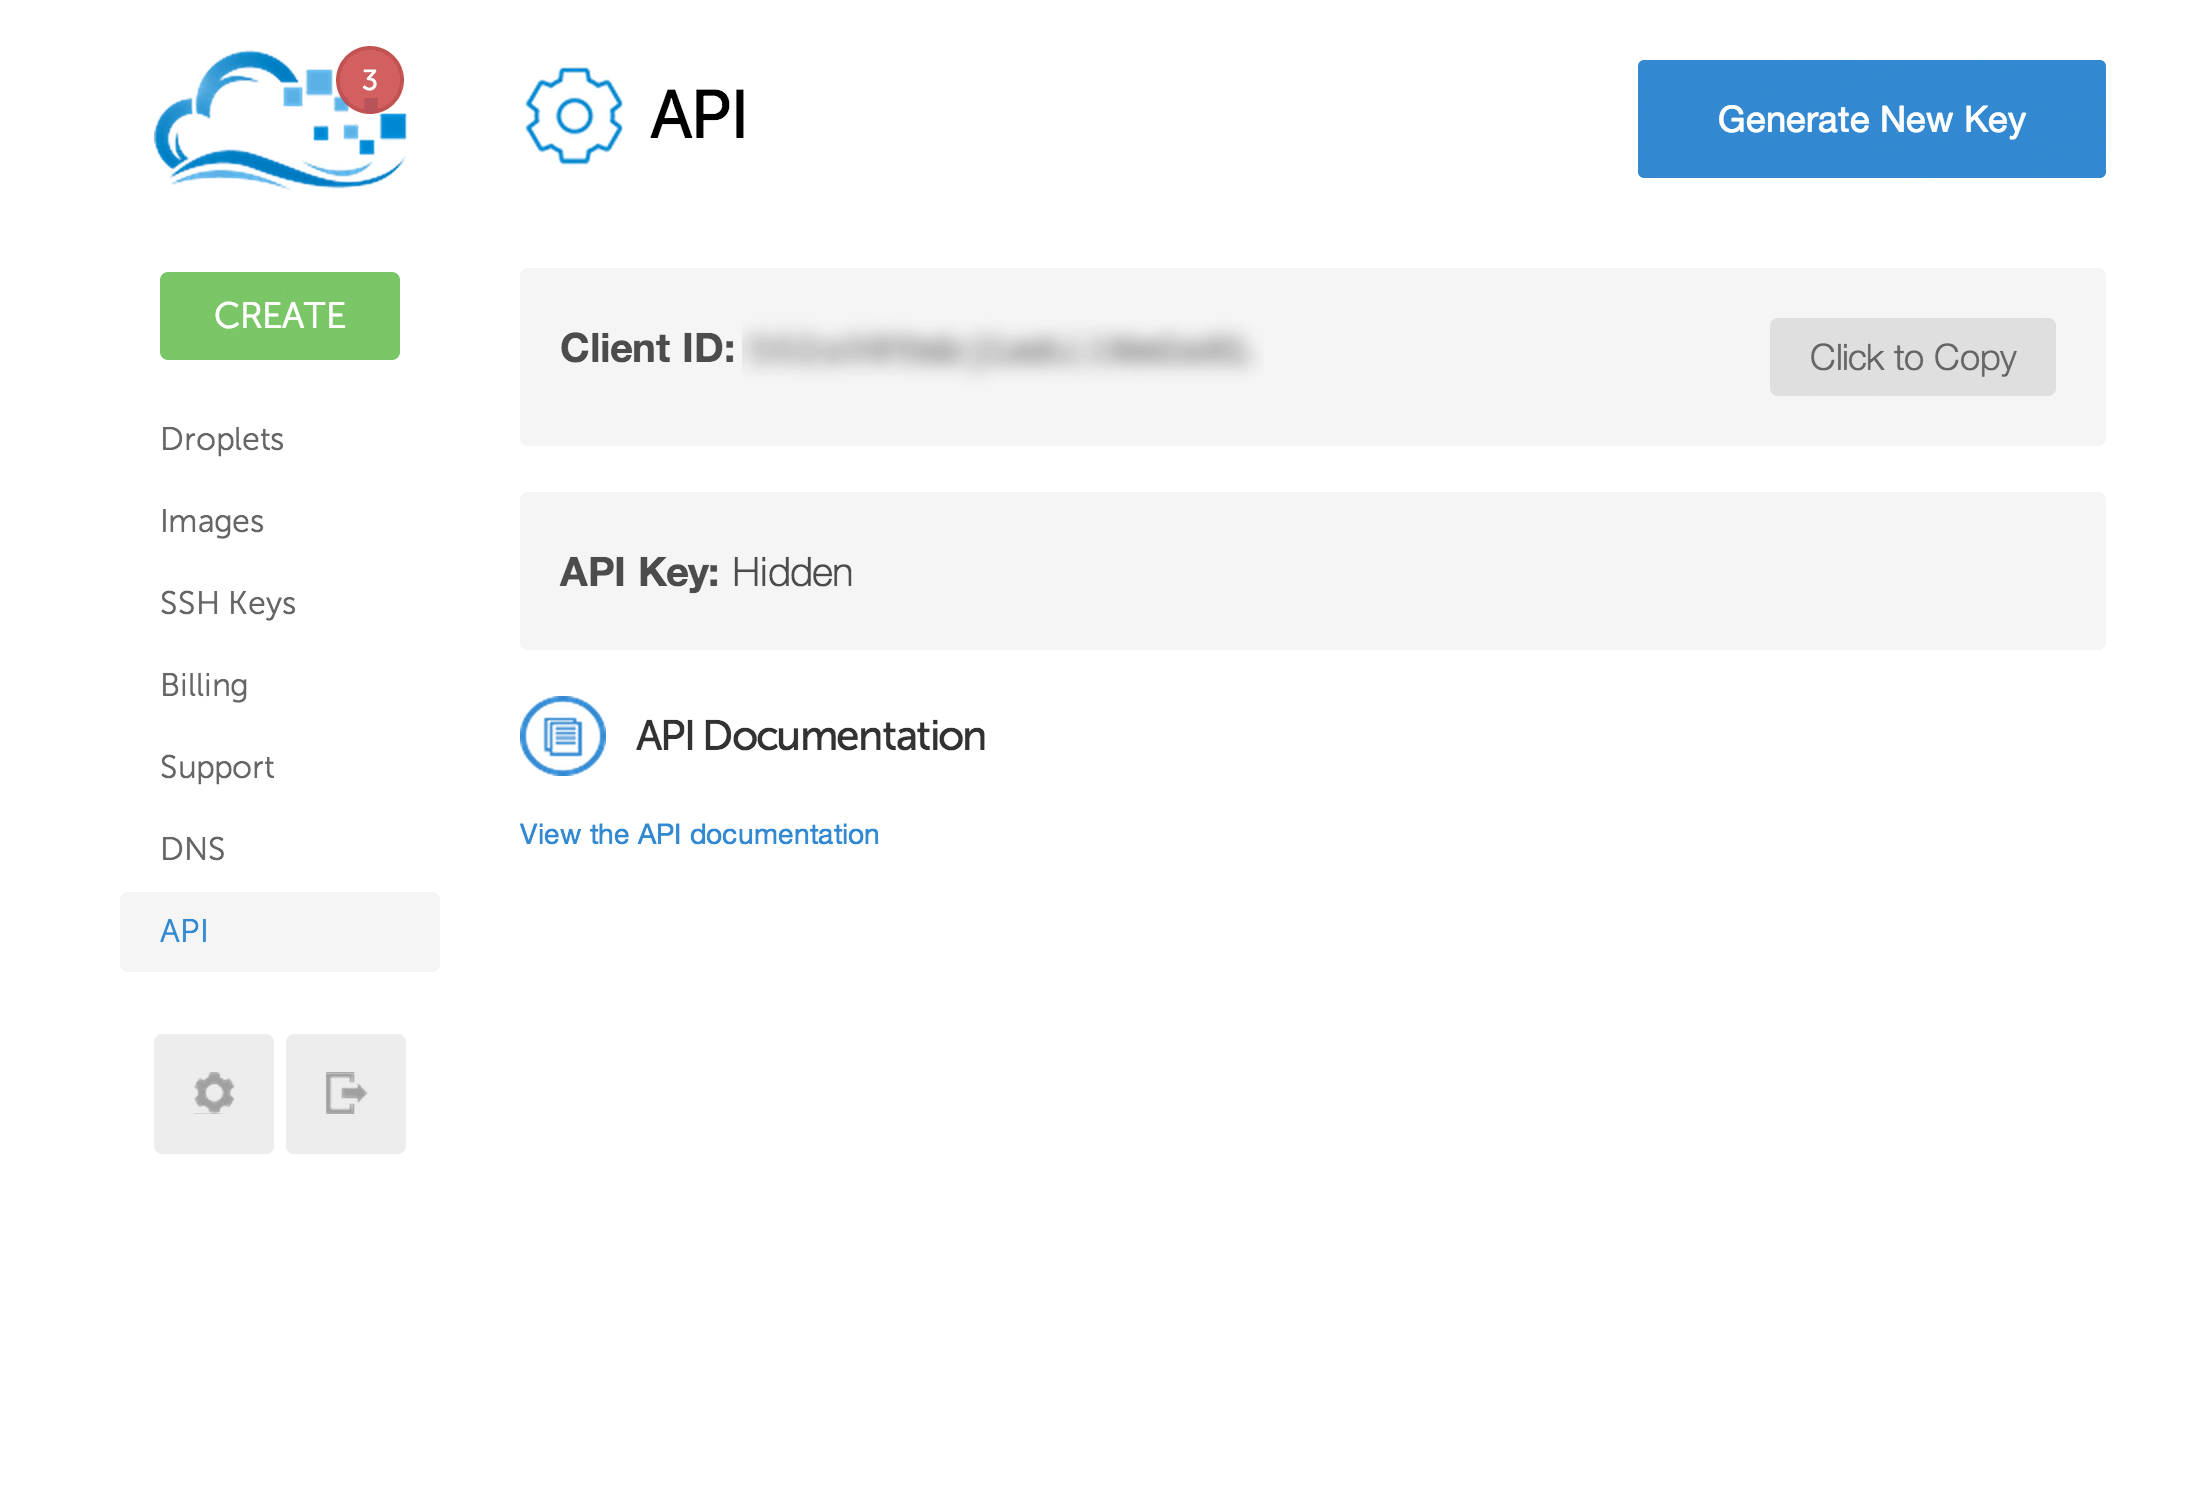
Finding your API keys
In order to grant Forge control over your servers, you'll need to give it API keys (and possibly other pieces of information, depending on the server).
DigitalOcean
Log in. In the left nav, the bottom item says "API"; click that and you'll get your Client ID and be able to generate or retrieve an API key.
Linode
Create or revoke API keys under My Profile
Rackspace
Amazon
Getting your Access Key ID and Secret Access Key
Create your first server
Once you've entered your authentication information, it's time to create your first server!
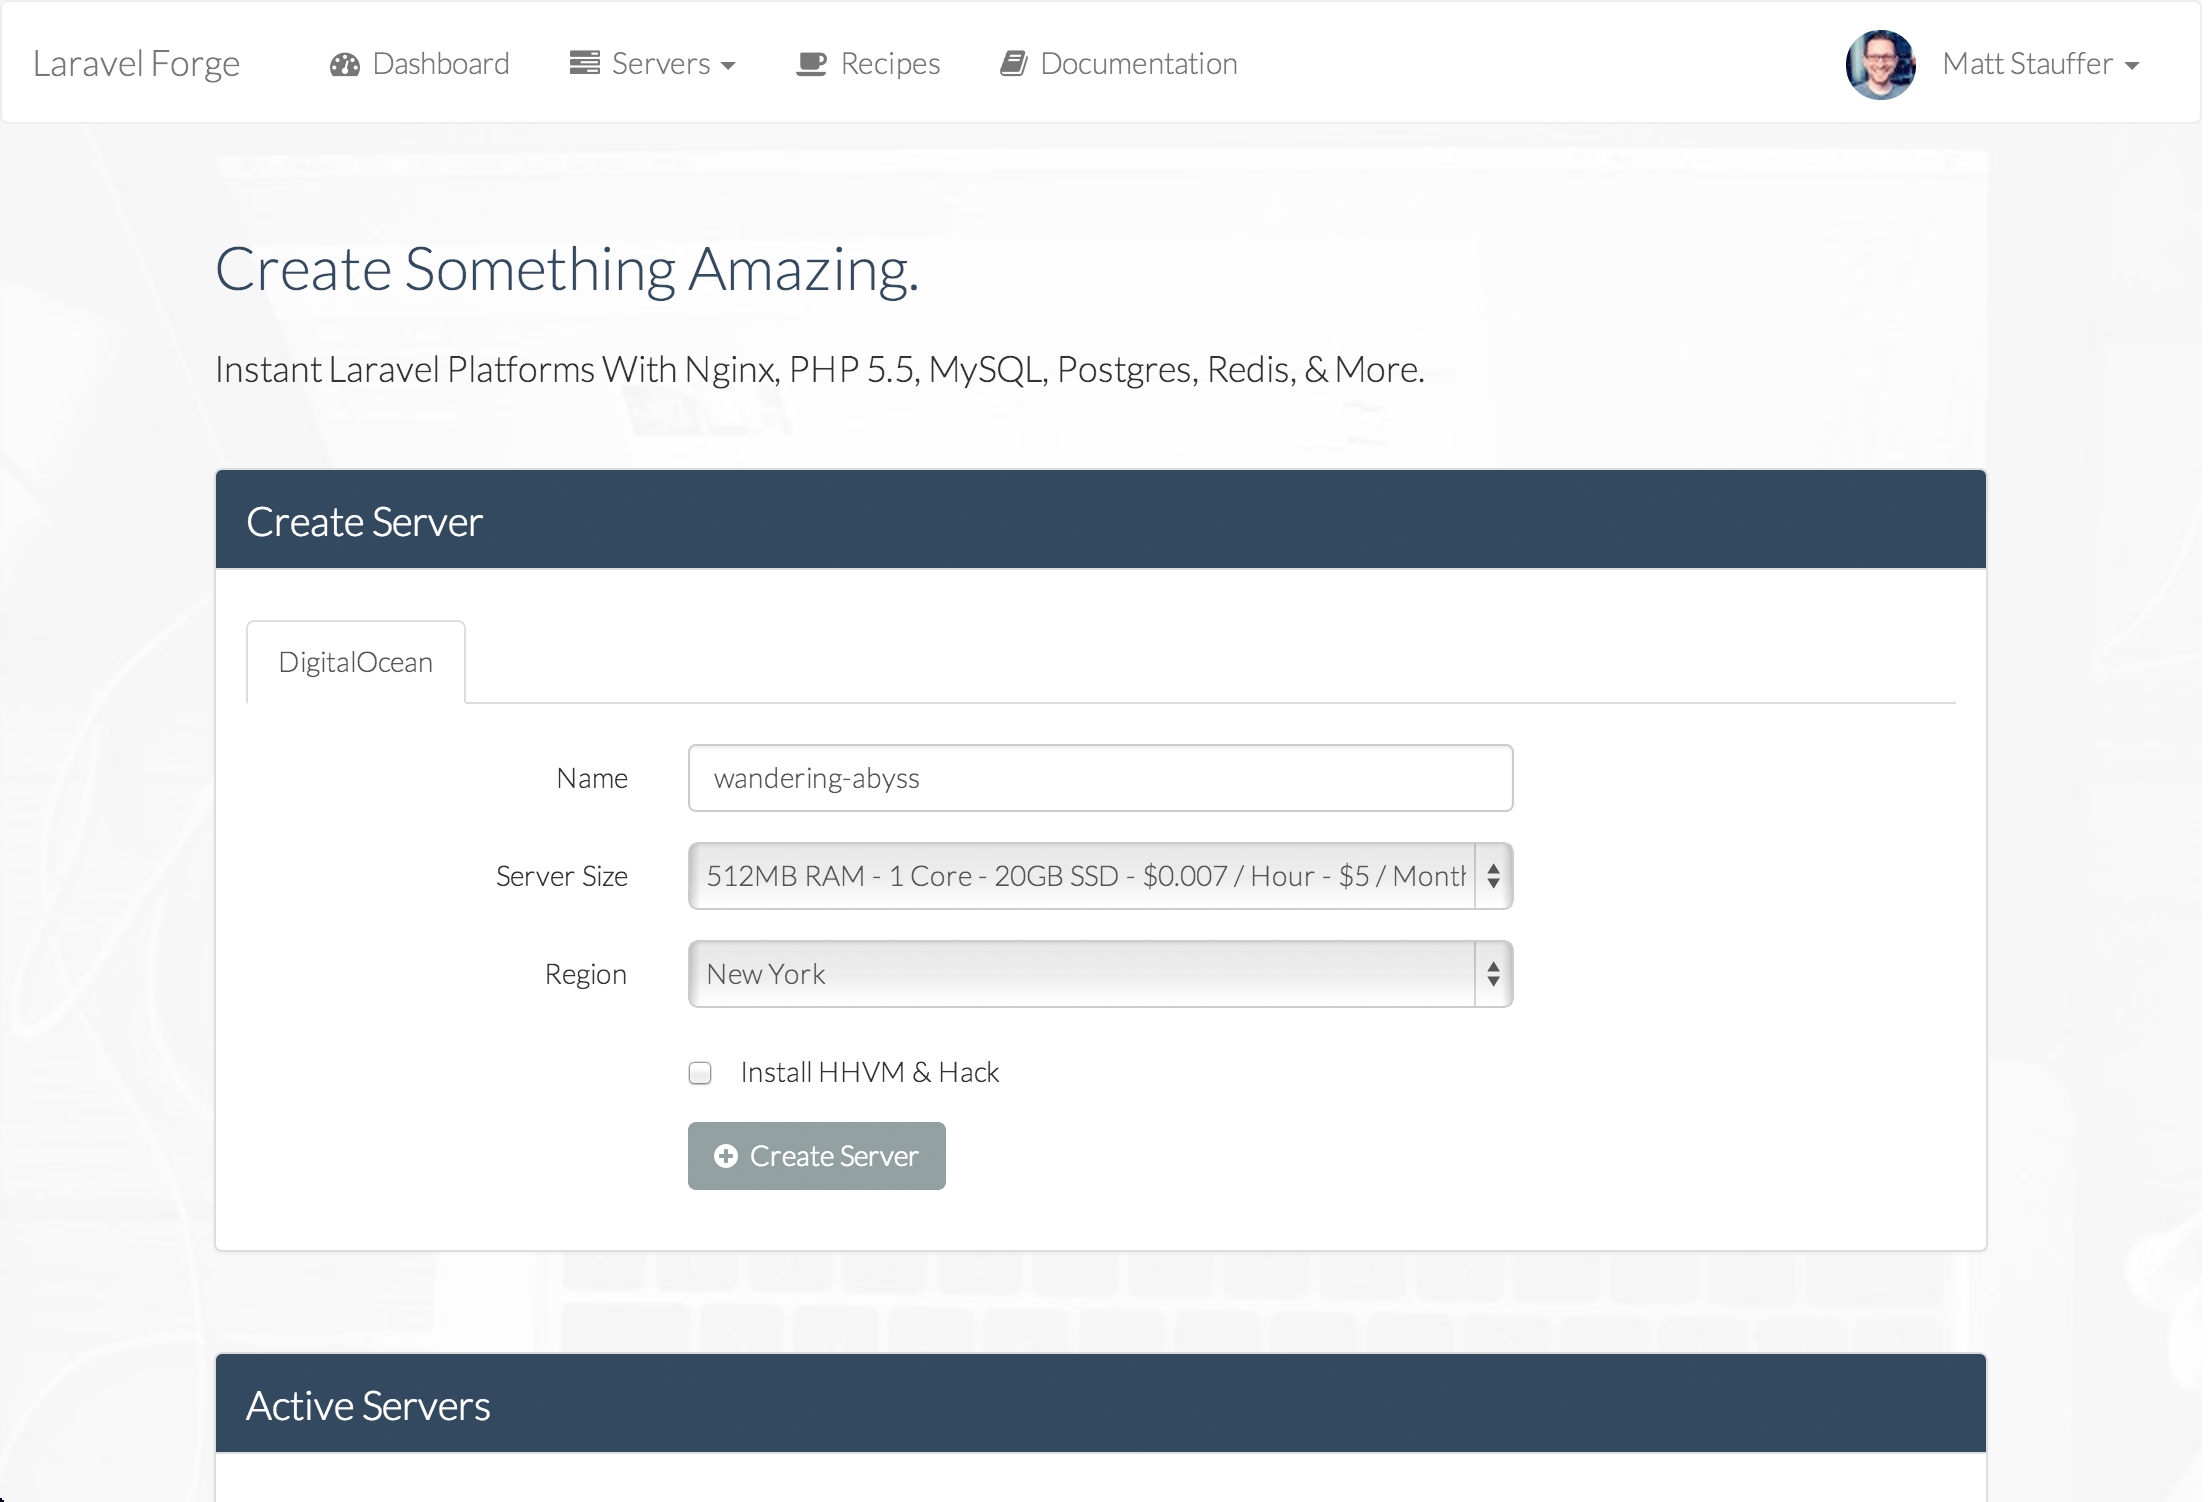
Name
Every server needs to have a unique name. Refresh the page a few times and you'll see that Forge is auto-generating readable nonsense names. You can put anything you want in here, but note that it'll need to be unique across your provider's servers, so you probably won't get away with "my-web-site" or something similar.
Server Size
Pick your poison. I always start with the cheapest option and upgrade as needed.
Region
Many hosts have servers all across the world. If you don't have any other infrastructure-related reason to choose a particular region, try to pick the region closest to the majority of your userbase.
Database Name (optional)
If you create your first database here, you'll save yourself the step below titled "Create Your Database."
HHVM/Hack
For now, just leave this unchecked. These are experimental and flaky (in general, and more so on Forge). Save that for an experiment on a later day.
Click Create
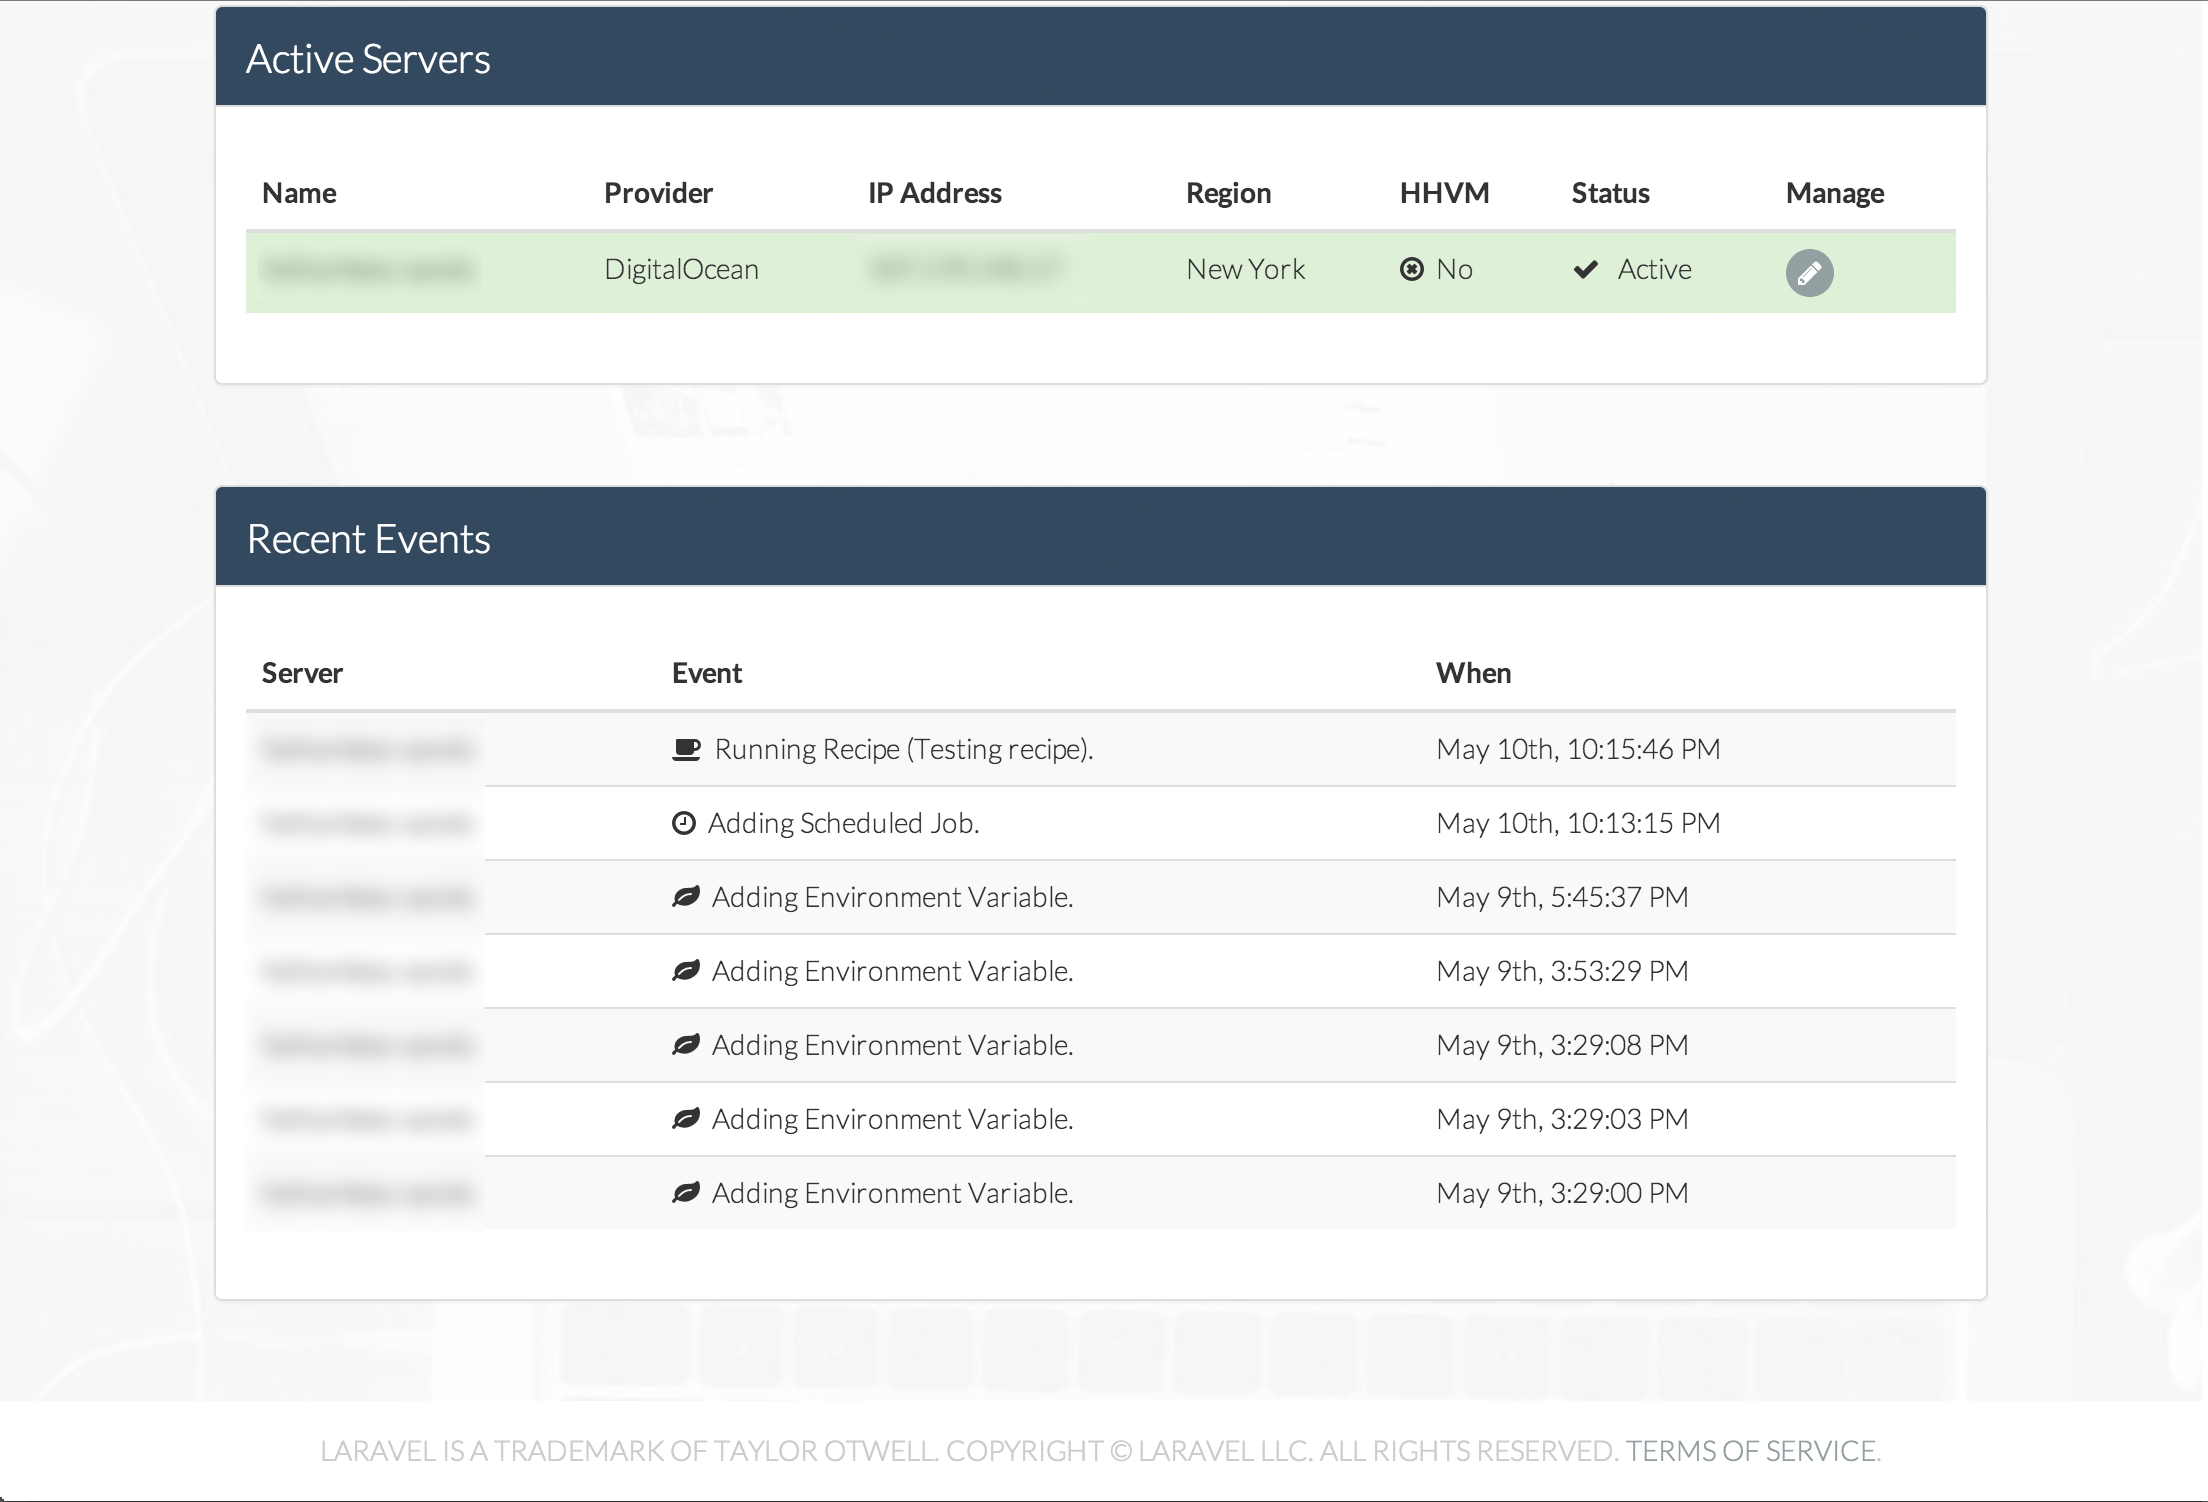
That's it! You'll see the server appear down below with the status; it'll start with Building and then move on to Provisioning, and within a few minutes you'll be up and running with an Active server.
Once the server goes active, you can click the Manage button...
Configuring your first server
OK, so you now have a Forge-provisioned server up and running. It's actually live on the Internet! In the Status Bar at the top of the page, you'll see two IP addresses, one with parentheses around it.
The first (non-parentheses-wrapped) IP address is your server's public IP address, and if you type this IP into a browser you'll see the `phpinfo()`` for your server.
The second (parentheses-wrapped) IP address is your server's internal IP address. Just leave that one alone for now.
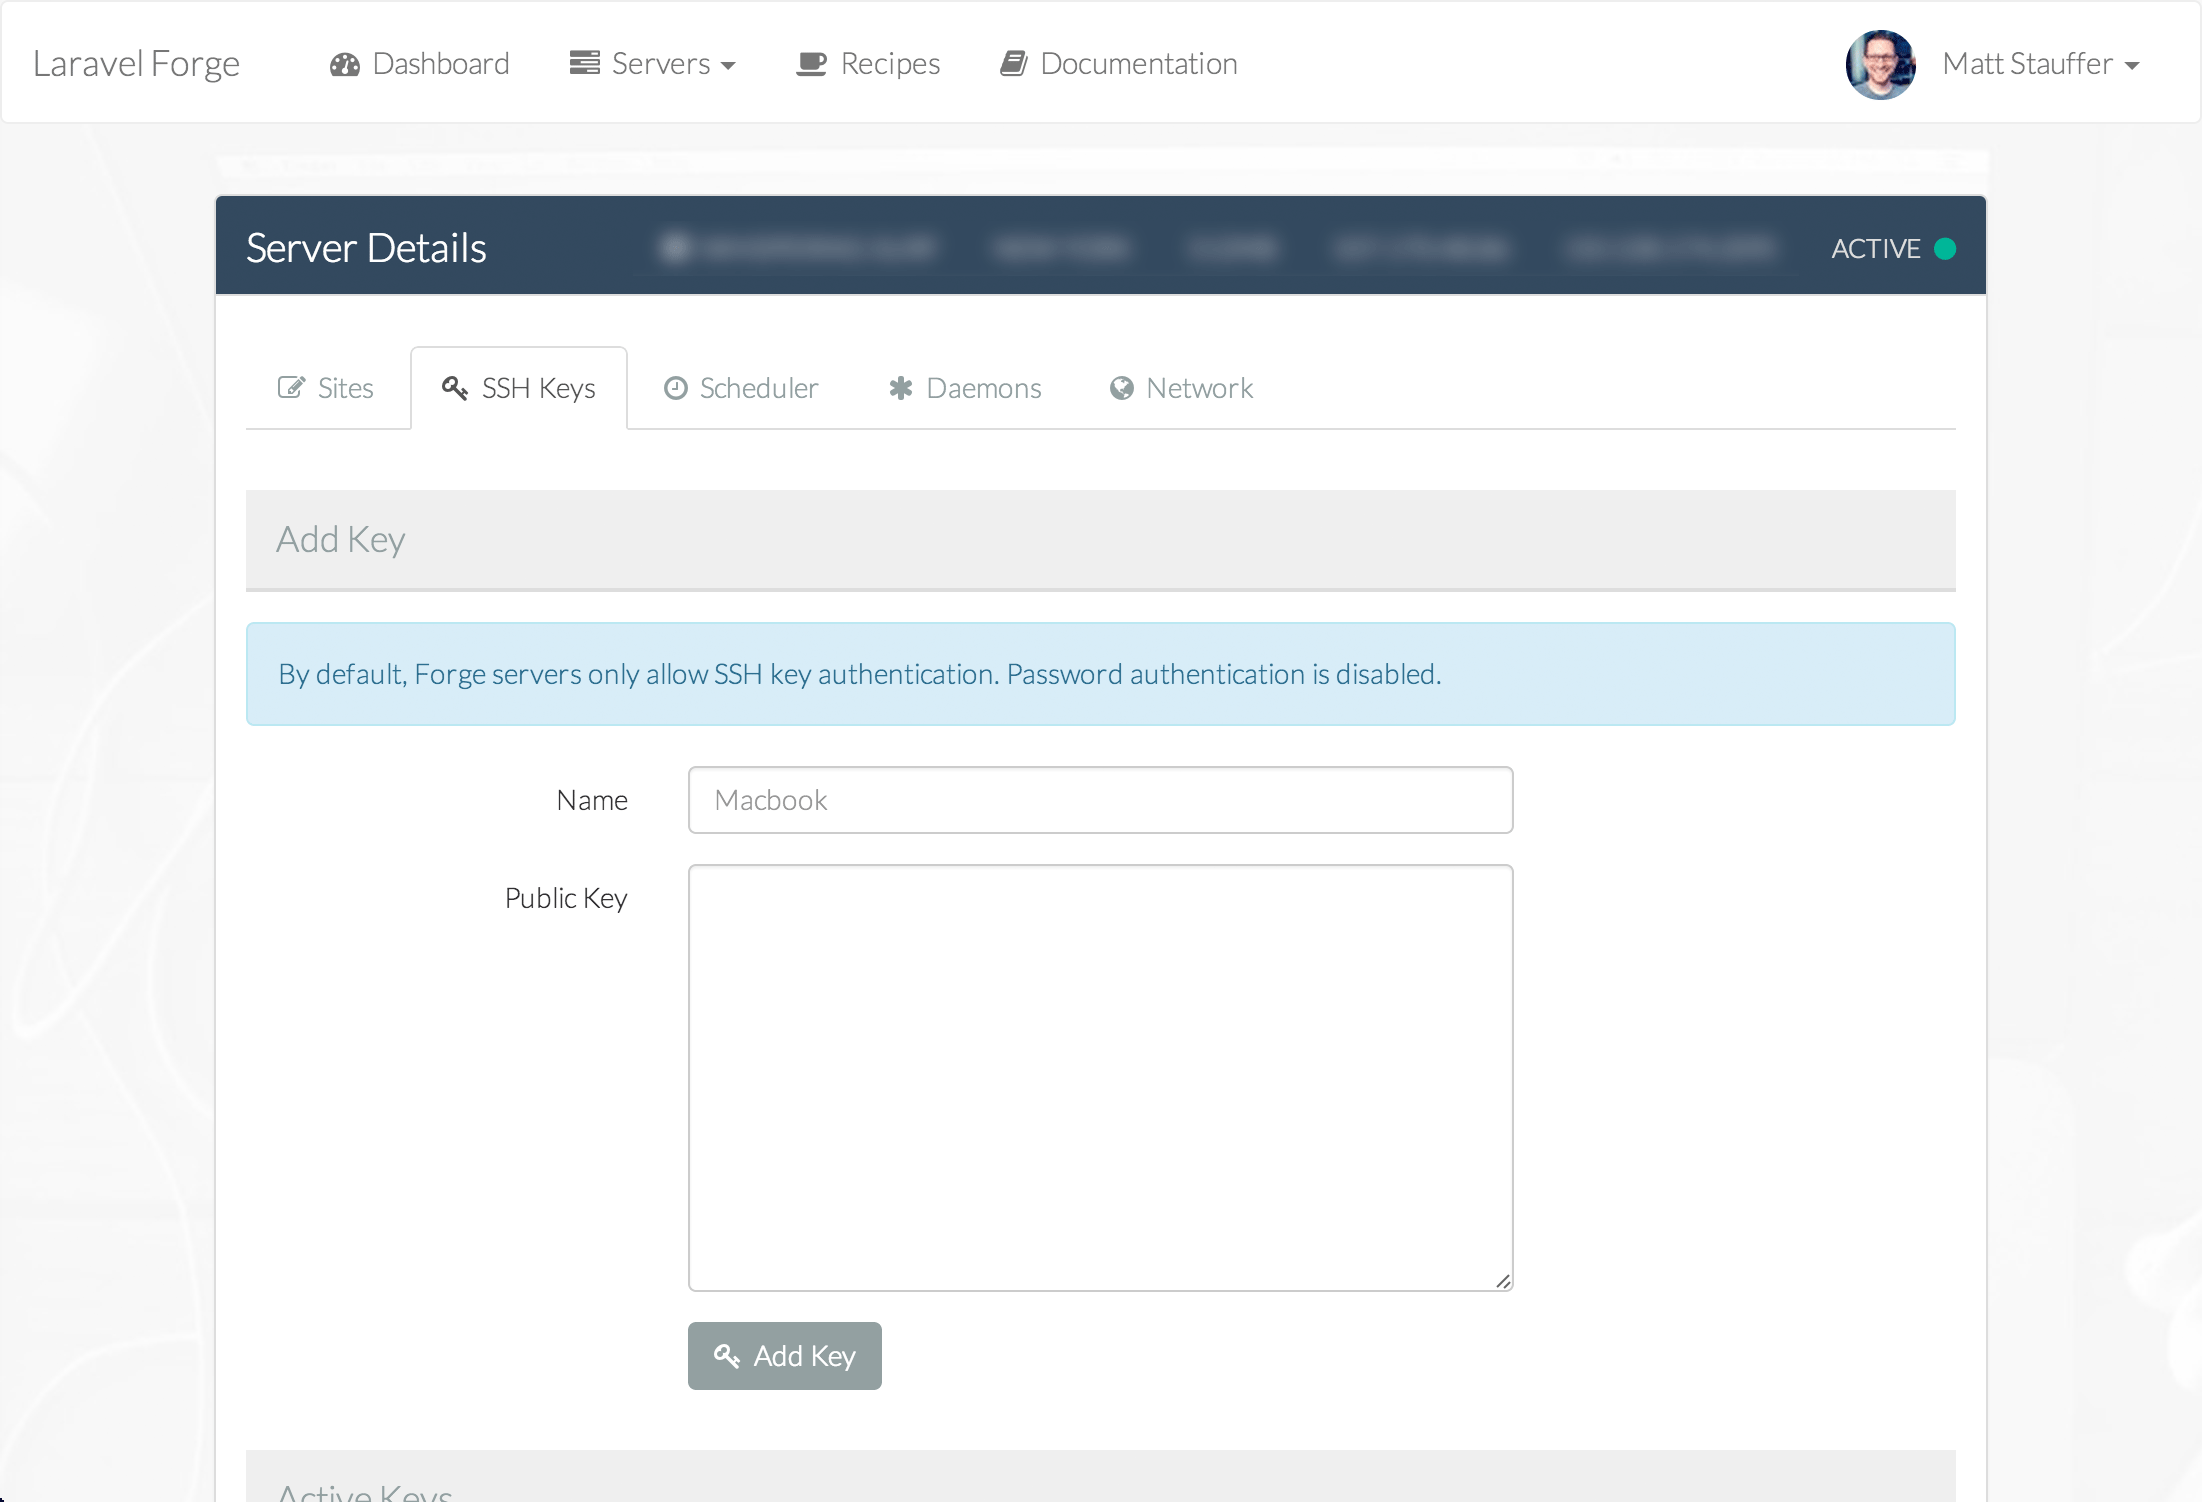
SSH key
You should be receiving an email in a moment with all of the configuration details you need, but you won't be able to use them until you upload your SSH key to Forge.
Click the SSH Keys tab and upload your local SSH Key. How to create and copy an SSH Key?
Point your domain
If you intend to visit the site you're setting up via a real domain (versus just testing it by visiting the IP address), you should set that up now, because DNS record changes can take a while to update. Go to your domain name provider, add an ANAME record for the domain or subdomain, and point it to the public IP address of your server. That's it!
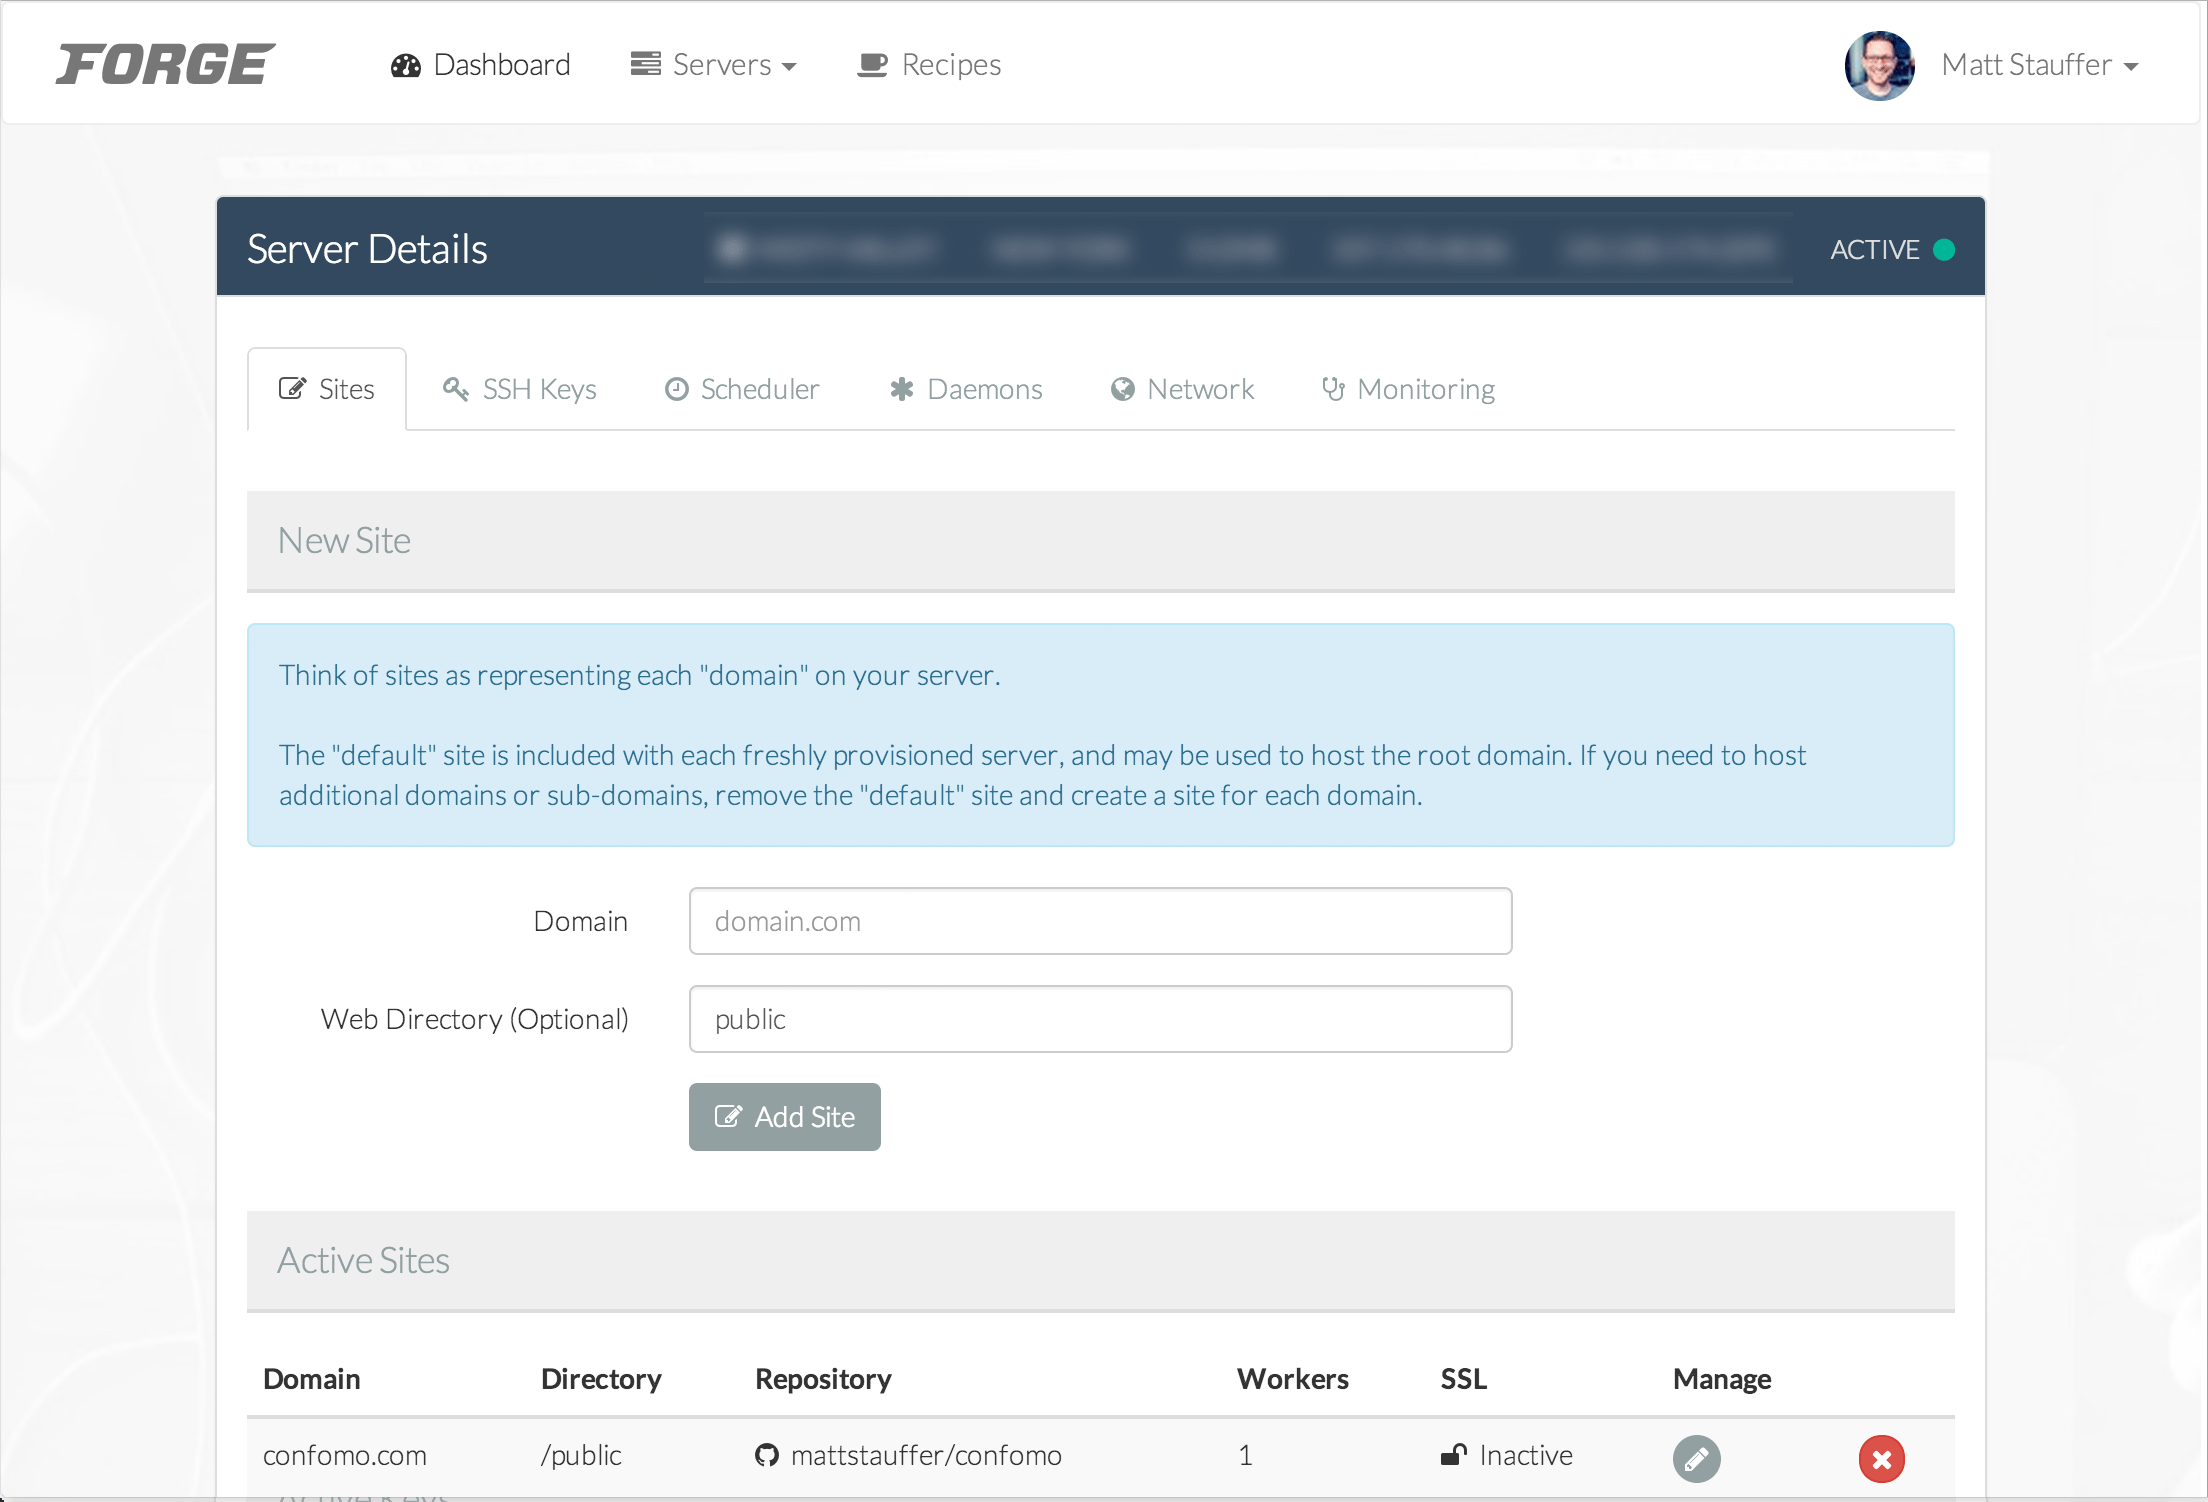
Create your first site
Every Forge server can have many sites on it. Traditionally, a site will be one site/one domain/one repository, although if you have multiple subdomains or domains served from the same Laravel repo, you may have multiple domains served from one site. But the hard rule is that there is always a one site to one repo relationship.
By default there's a "default" site installed, which you can use if you plan on this server only serving one web site (or if you're just trying this out and plan to access the app only via its IP address). Otherwise, delete it and follow the directions below to create your first site.
Configure domain and web directory
First, set a domain for the site, and optionally set a web directory. The domain is the domain name you expect to access this site from; the web directory is the directory within your repo that you want the files served from. As you can see, the default is "public" because that's the directory Laravel sites serve from.
Create your database
Before you attach your Laravel codebase to your Forge site, you'll want to create its database--otherwise your initial migrations will fail. You may have done this already in the "Create your first server" step, but if not, or if you'd just like to get access to the database server now, here's how to do it.
Follow the instructions at the Docs' Databases Section section to get your SQL admin app connected (use Sequel Pro if you don't have one). Note that the usernames and passwords you're entering there are not accessible from Forge, but will have arrived in an email from Forge titled "Server Provisioned." Save this information. That's the only place it lives now.
Connect to your database server, and add a database with the name of your Laravel app's expected database. Now, when you first hook up your Laravel codebase, Forge will be able to run your migrations correctly.
Modify your Laravel code
You'll want to modify your app's code for whichever environment this will be. Update your database settings to use the host, username, and password specified in the "Server Provisioned" email. Now push your Forge-ready code up to Github.
Quick tip
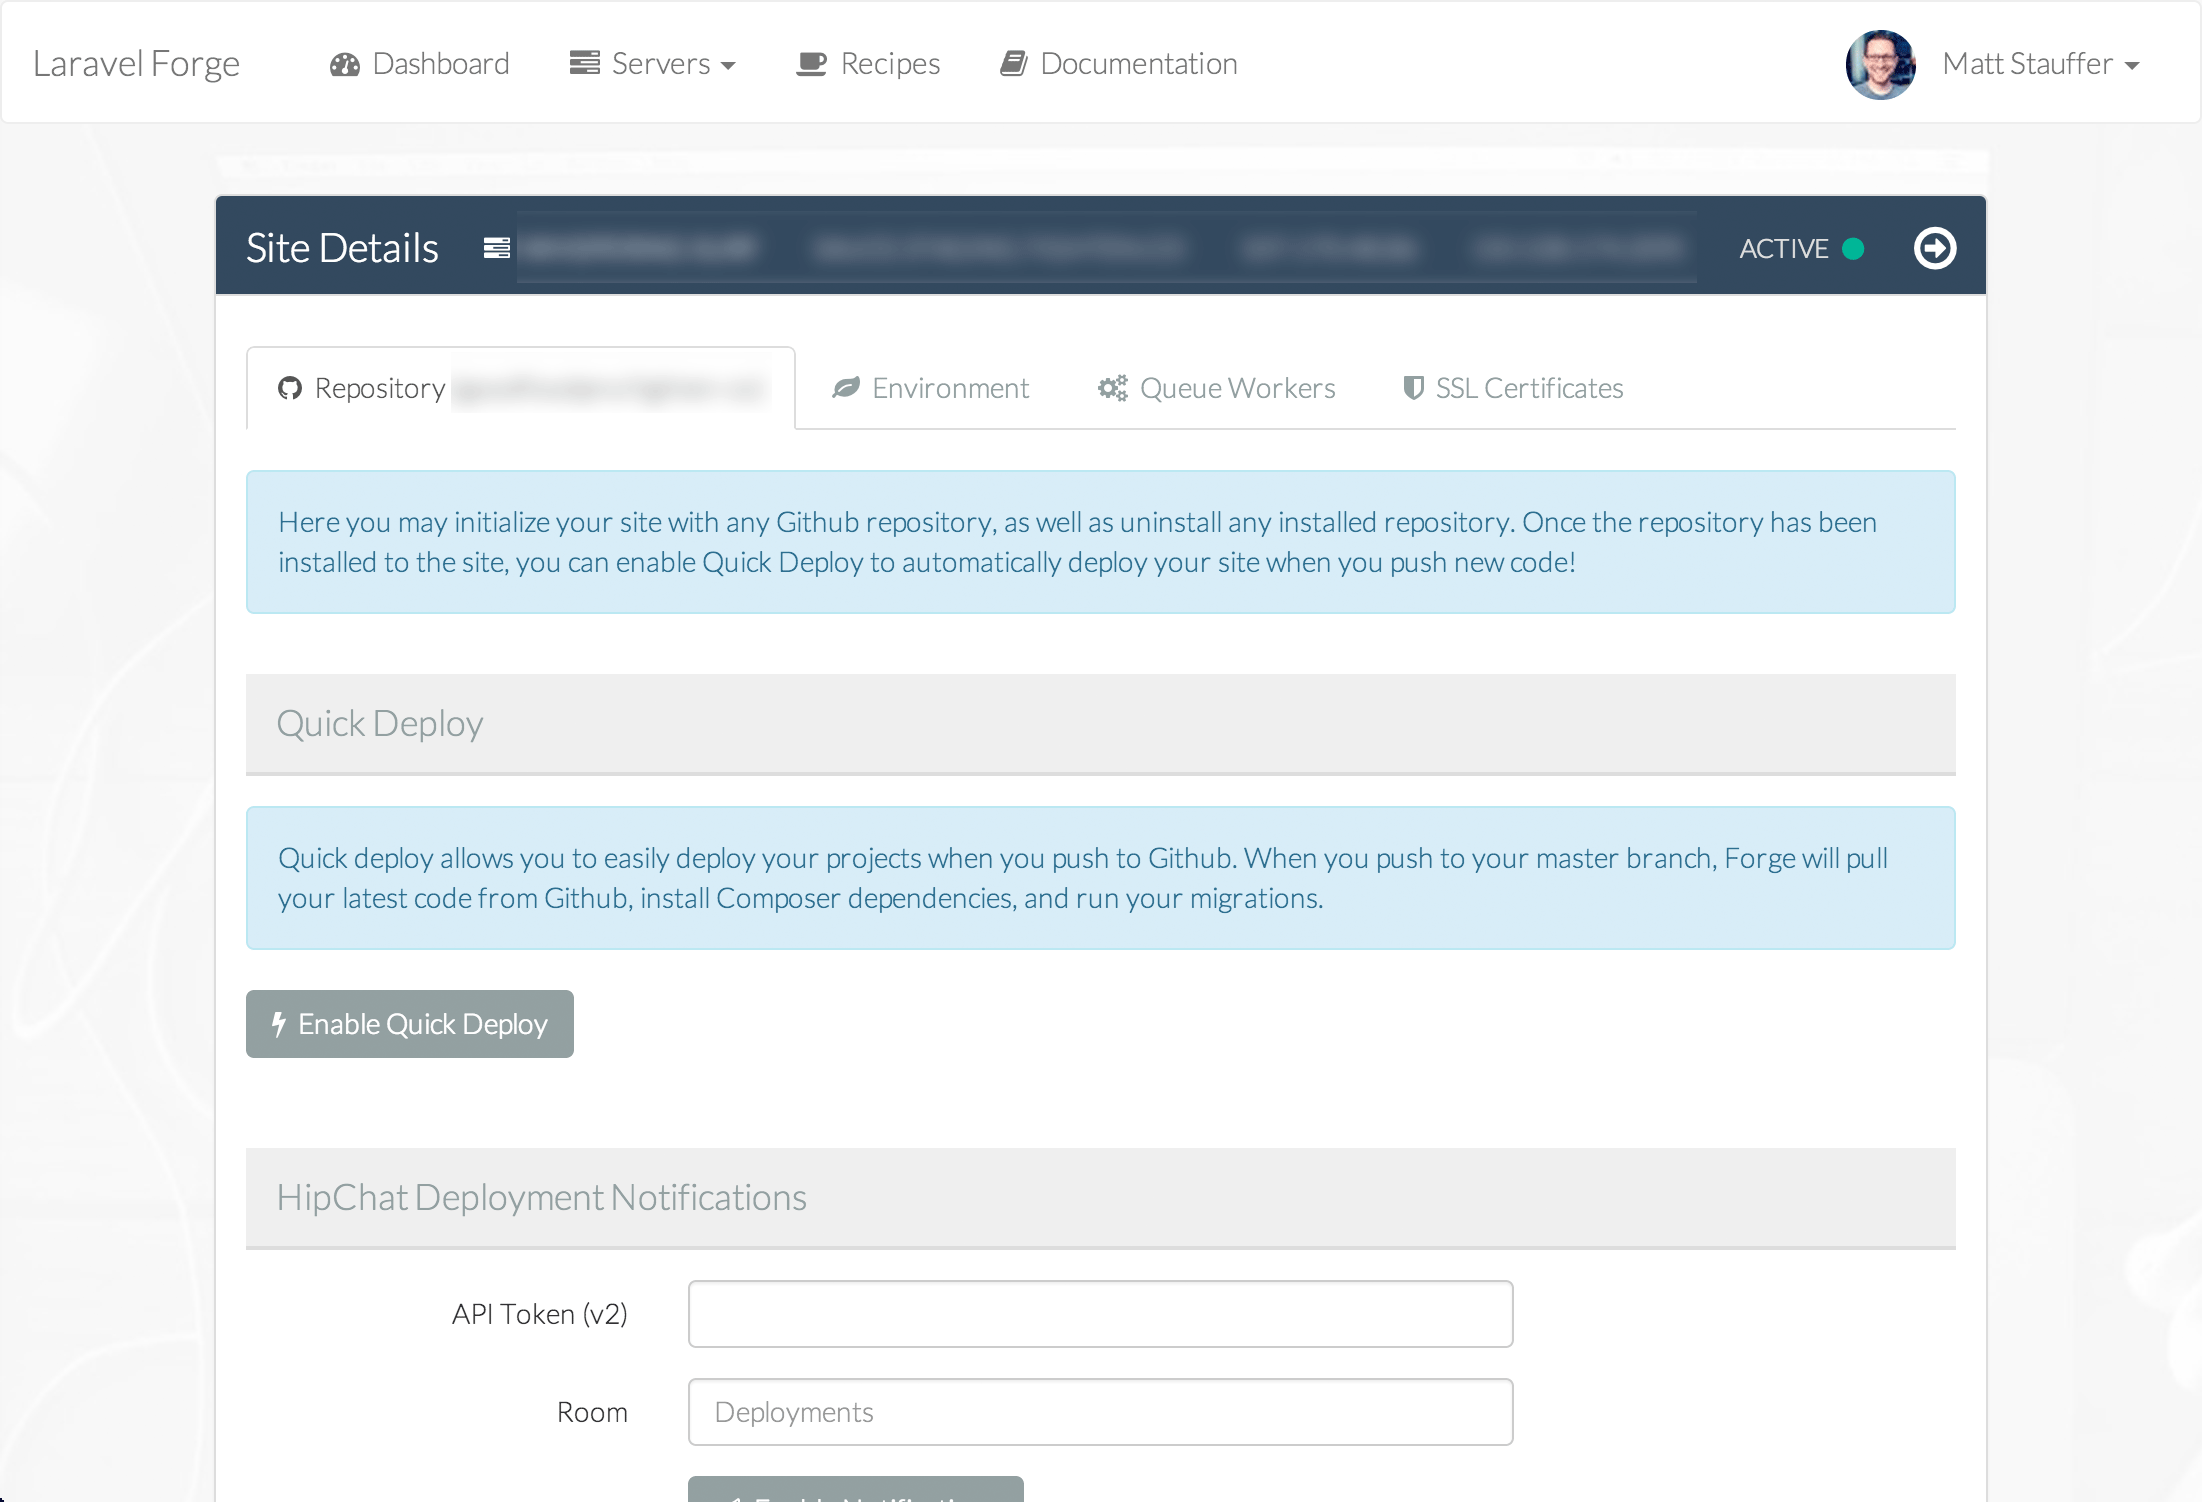
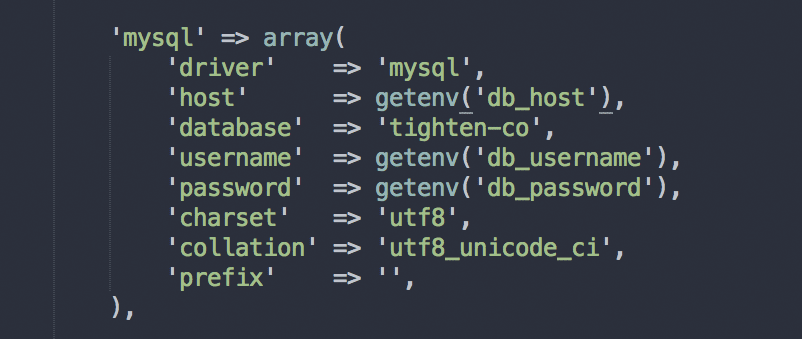
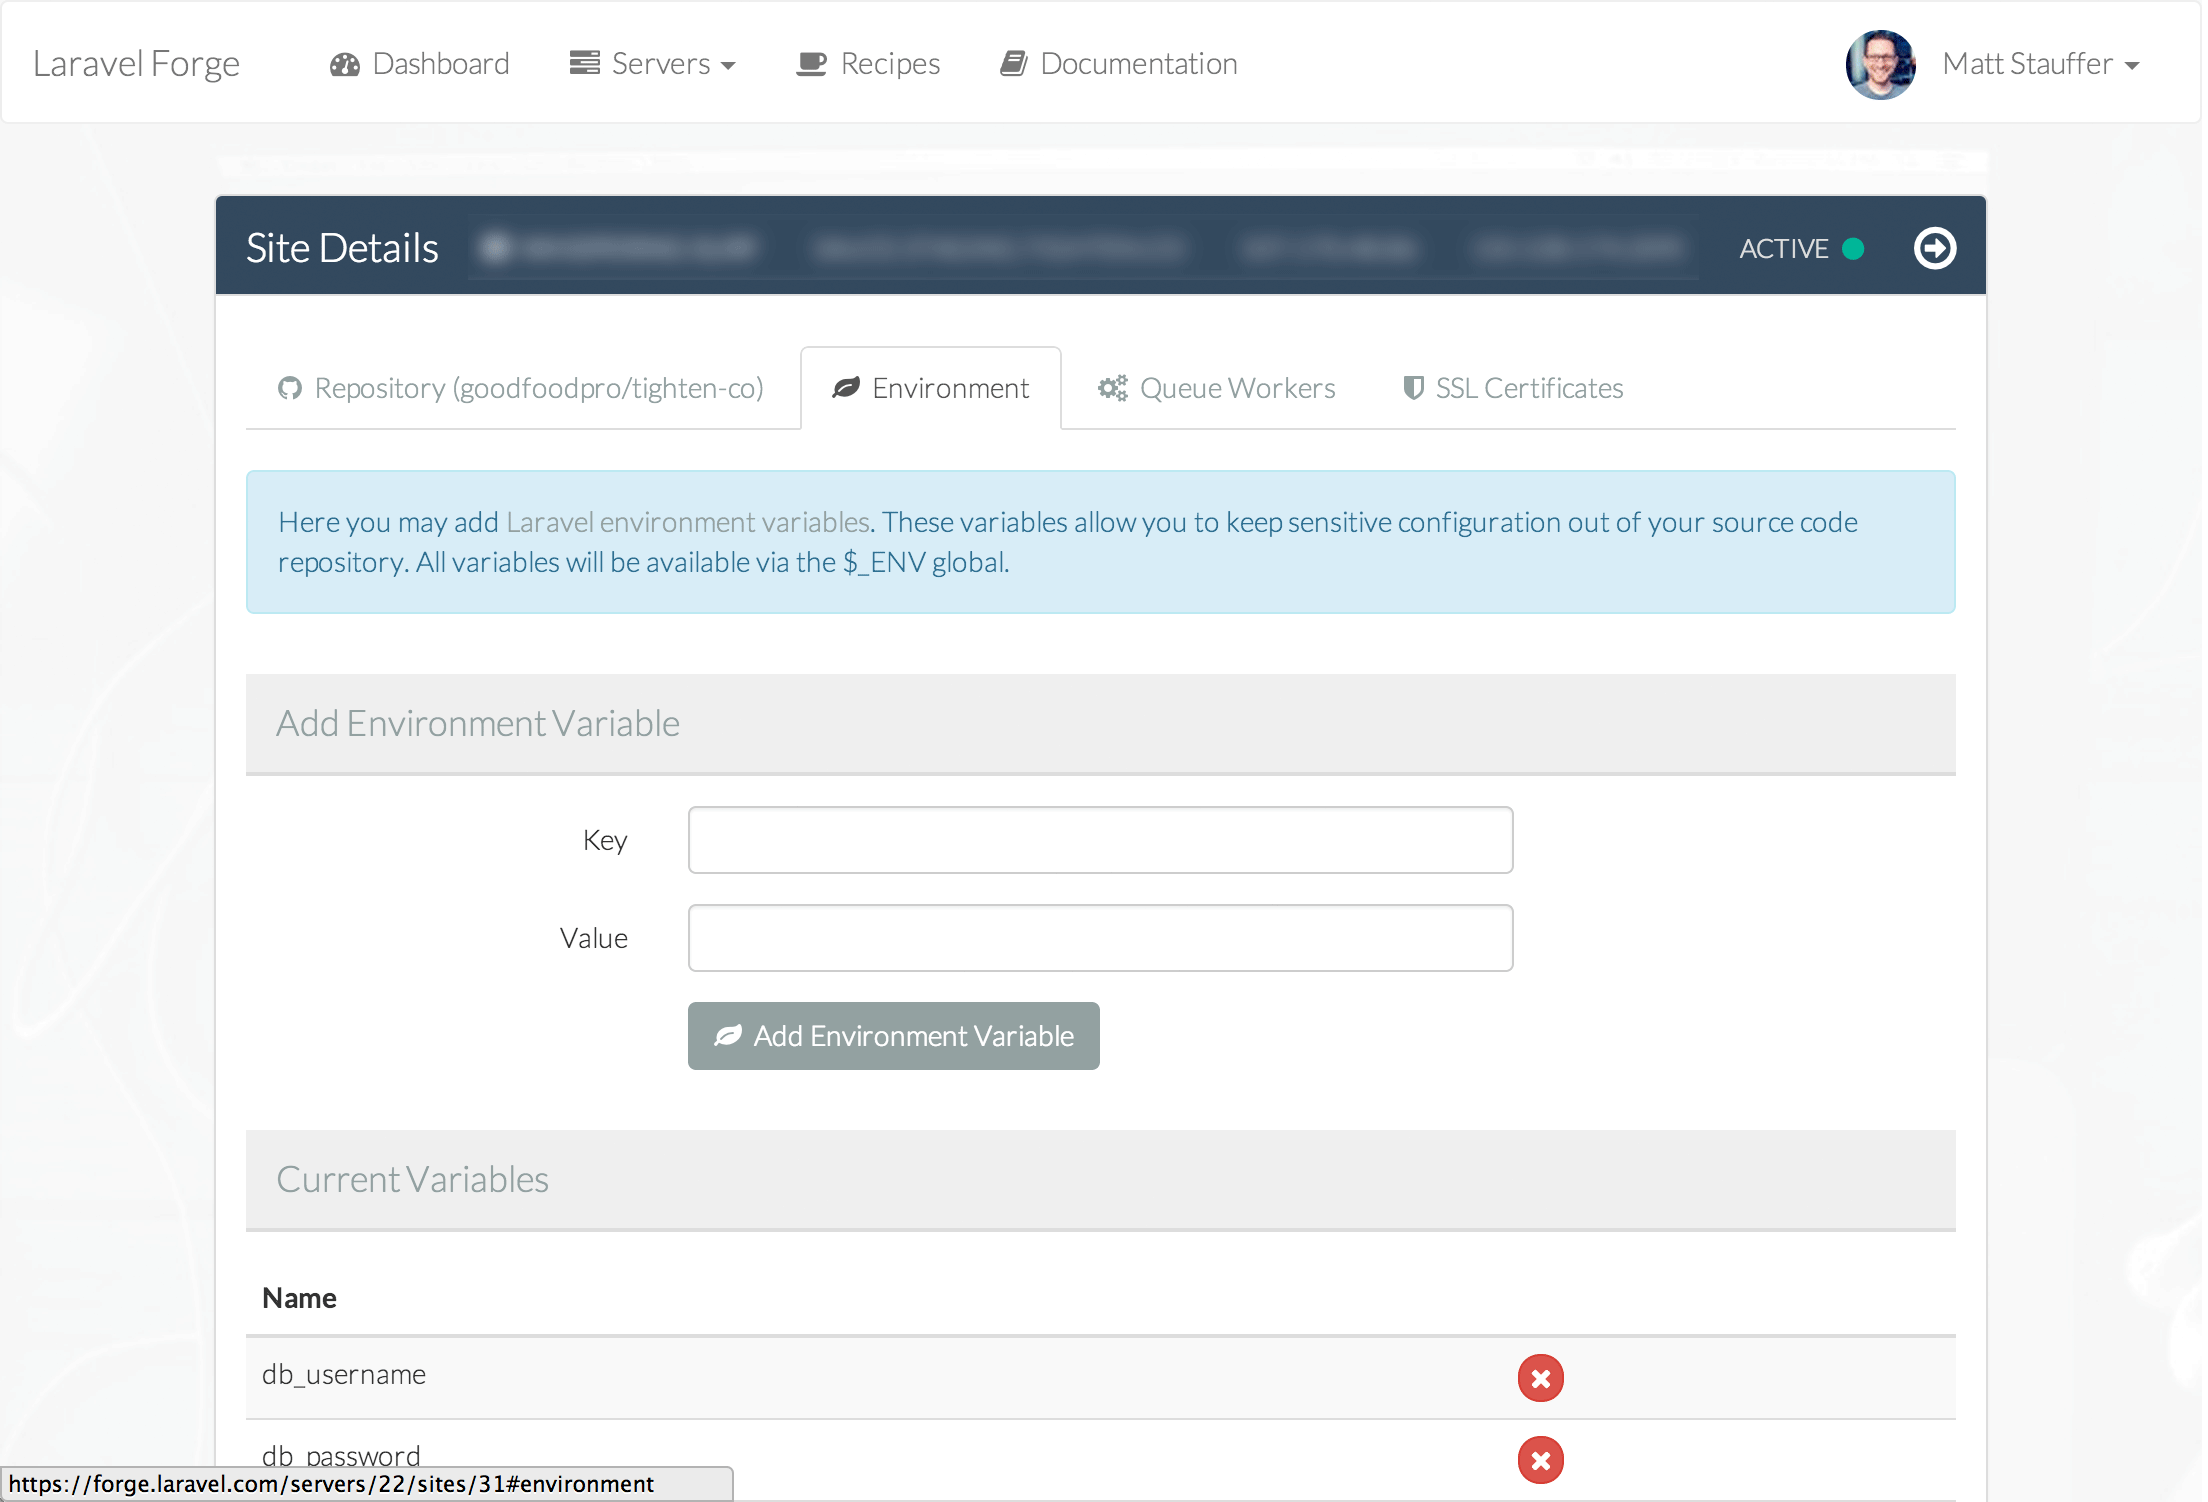
Something I learned from Heroku: I store my server IP, database username, and database password in environment variables (see Forge's Site manager, and the Environment tab). Then in my database.php I just set the host, username, and password to be getenv('db_host'), getenv('db_username'), and getenv('db_password'), which gets the environment variables with those names.
When you're setting environment variables in Forge, note that the "Environment (optional)" flag allows you to determine which Laravel environment these will be passed to; the default is "production".
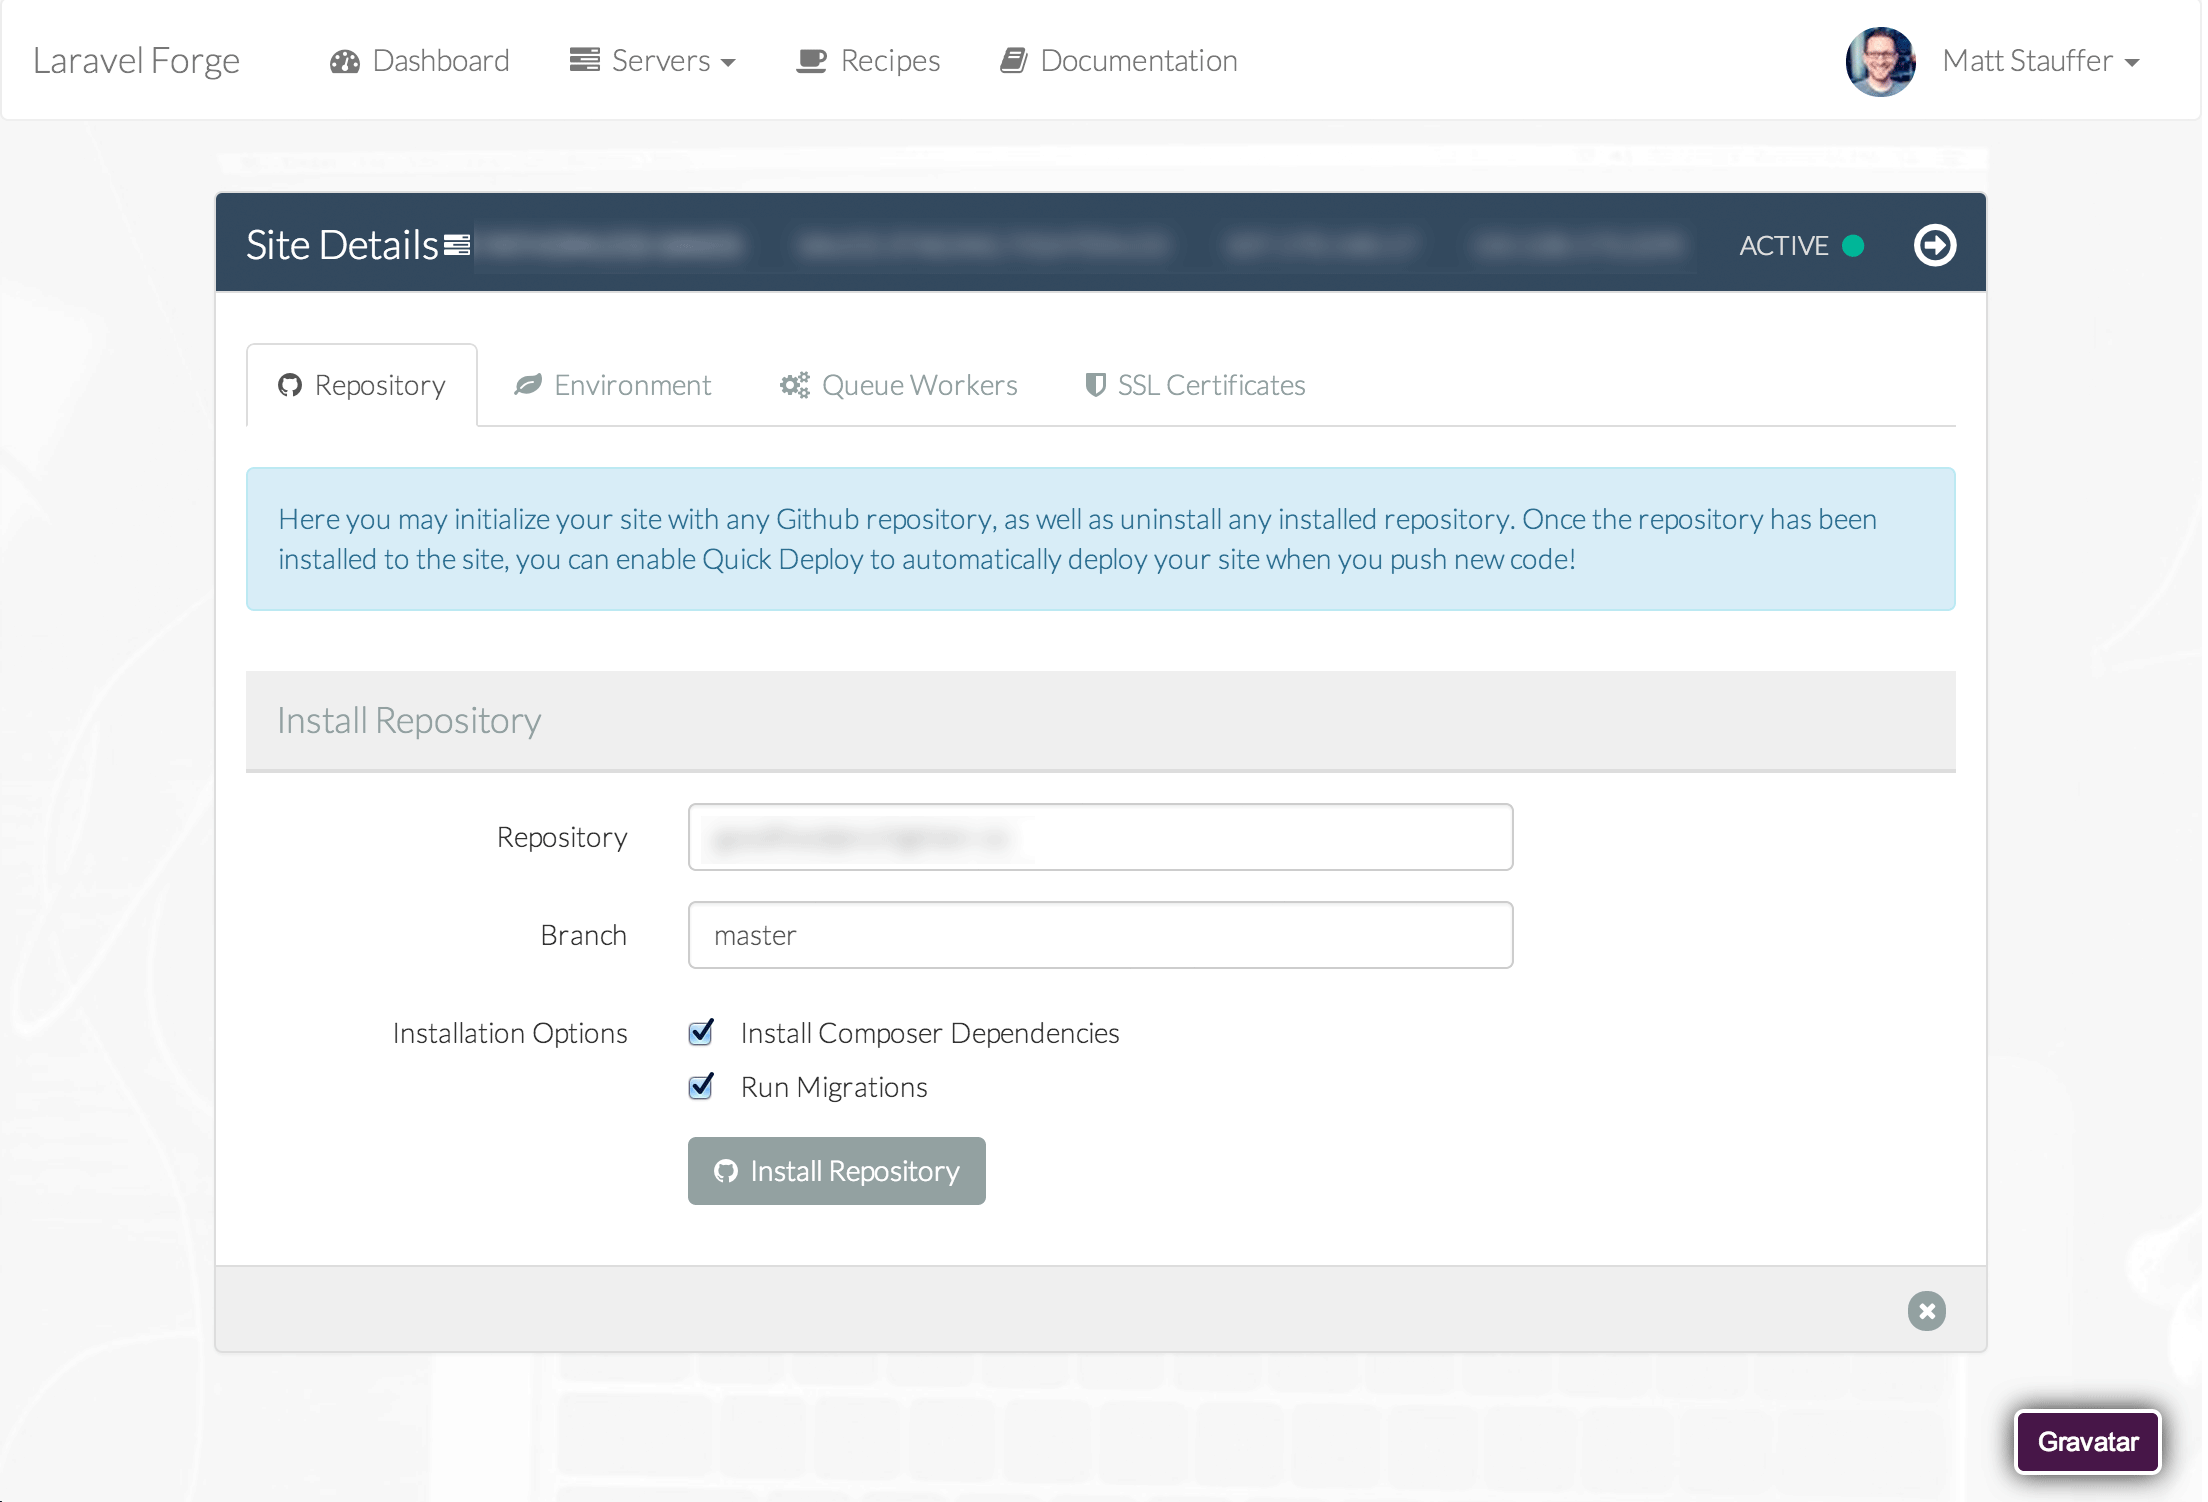
Configure Github link
Once the site is ready for you, and you've created your database and updated your app and pushed the changes to Github, click the Manage button for your site. Choose a github repo (for example, http://github.com/mattstauffer/confomo would be "mattstauffer/markedstyle"), branch (default to "master"), and sync strategy (Quick Deploy deploys the code to your Forge server every time you push to your chosen Github branch; not using Quick Deploy means you can push manually via Envoy or SSH, or use the "Deploy Now" button whenever you're ready).
You can also choose how to handle Composer and migrations. By default I would check both.
Once you complete this step Forge will download your files and (optionally) run composer install and artisan migrate.
Check it out
If everything went smoothly, your site should be up and running on your server, ready for you to go visit it. You can visit the public IP and you'll see the default site.
You should also be able to visit any domains you pointed to this server earlier. Check it out--you just set up your first Forge-provisioned site!
Other common tasks
SSH in
But what if you want to git pull manually? To live-edit the site with Vim (NO!)? To run your database seeds? Or whatever other mischevious things you might want to do with SSH access?
You can use an SSH config file to create easy shortcuts to your Forge server, but even without that, you can just ssh YOUR_IP_HERE from the command line and, since you've already uploaded your SSH key, you should be good to go. ls from your root directory and you'll see a folder for every site you set up.
Setting up a few basic envoy scripts
If you decide to manage deploying your site manually, you can always use the "Deploy Site" button in the control panel, but you can also set up an Envoy script. For example:
@servers(['forge' => 'YOUR_IP_HERE'])

@task('deploy', ['on' => 'forge'])
    cd your-site-domain-here/
    git pull
@endtask

@task('full-deploy', ['on' => 'forge'])
    cd your-site-domain-here/
    git pull
    composer install
    php artisan migrate
@endtask%
Customizing the deploy script
By default, all manual deploys and quick deploys from Forge will use the following general script:
cd {dir}
git pull origin {branch}
composer install
php artisan migrate
But if you want to customize this, you can click Edit Deploy Script on the Site details page.
Recipes
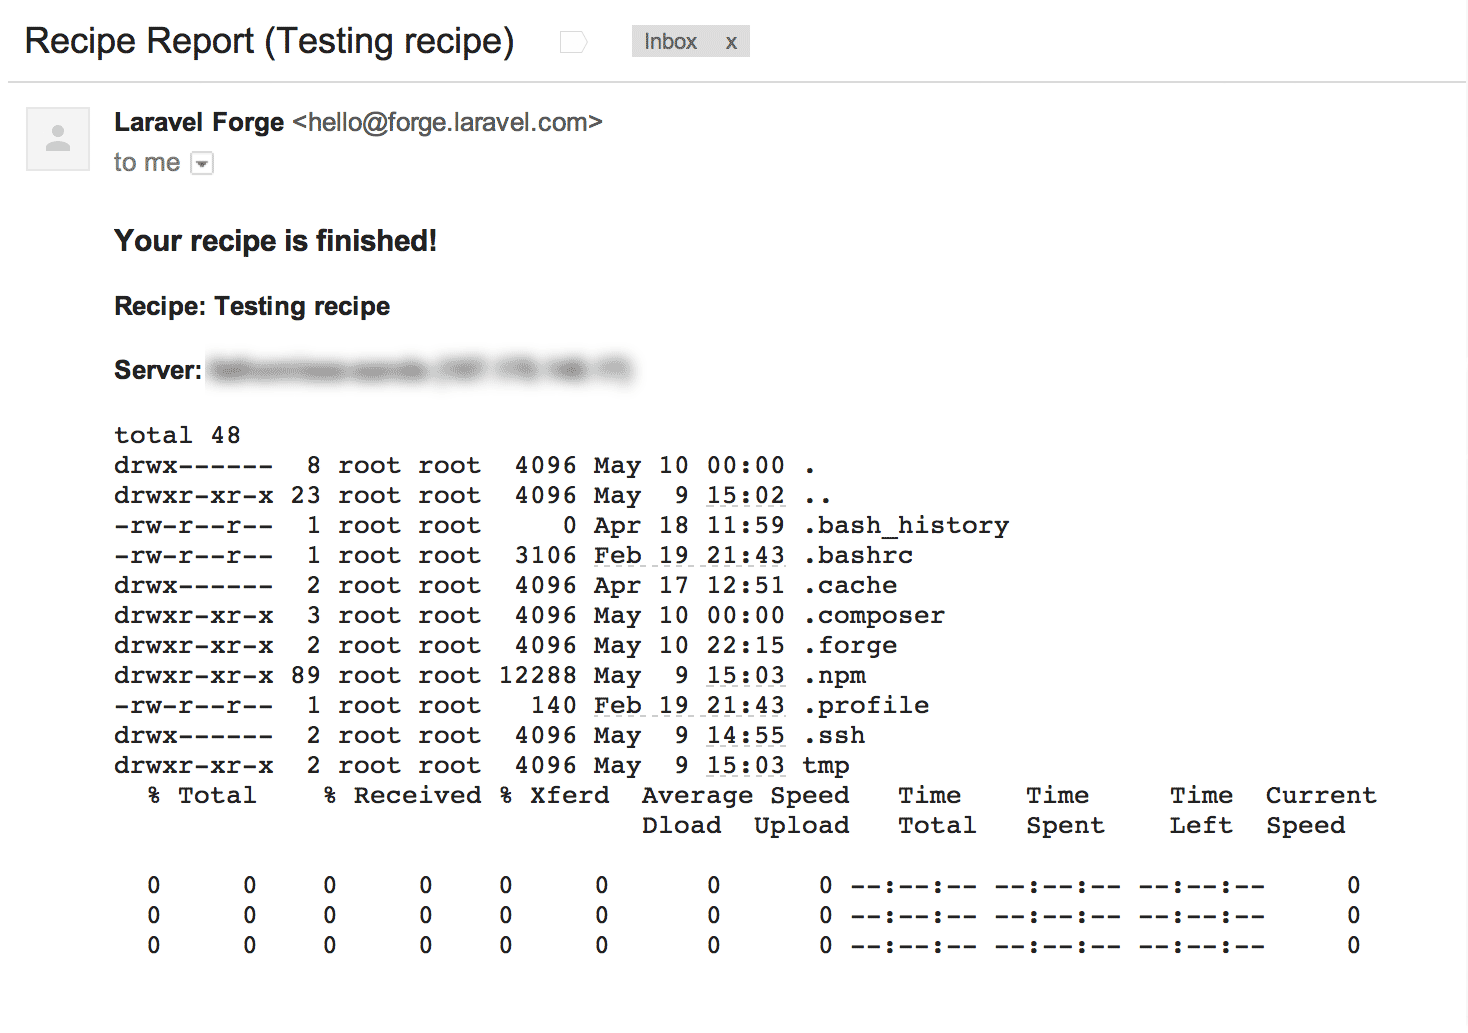
Forge recipes are pre-written Bash scripts (shell scripts) that you can run at any point on any of your servers. Symlinks, installations, downloads, or whatever else you want--write simple shell scripts, give them a name, and easily run them any time you want, with a checkbox for each server you might want to run it on.
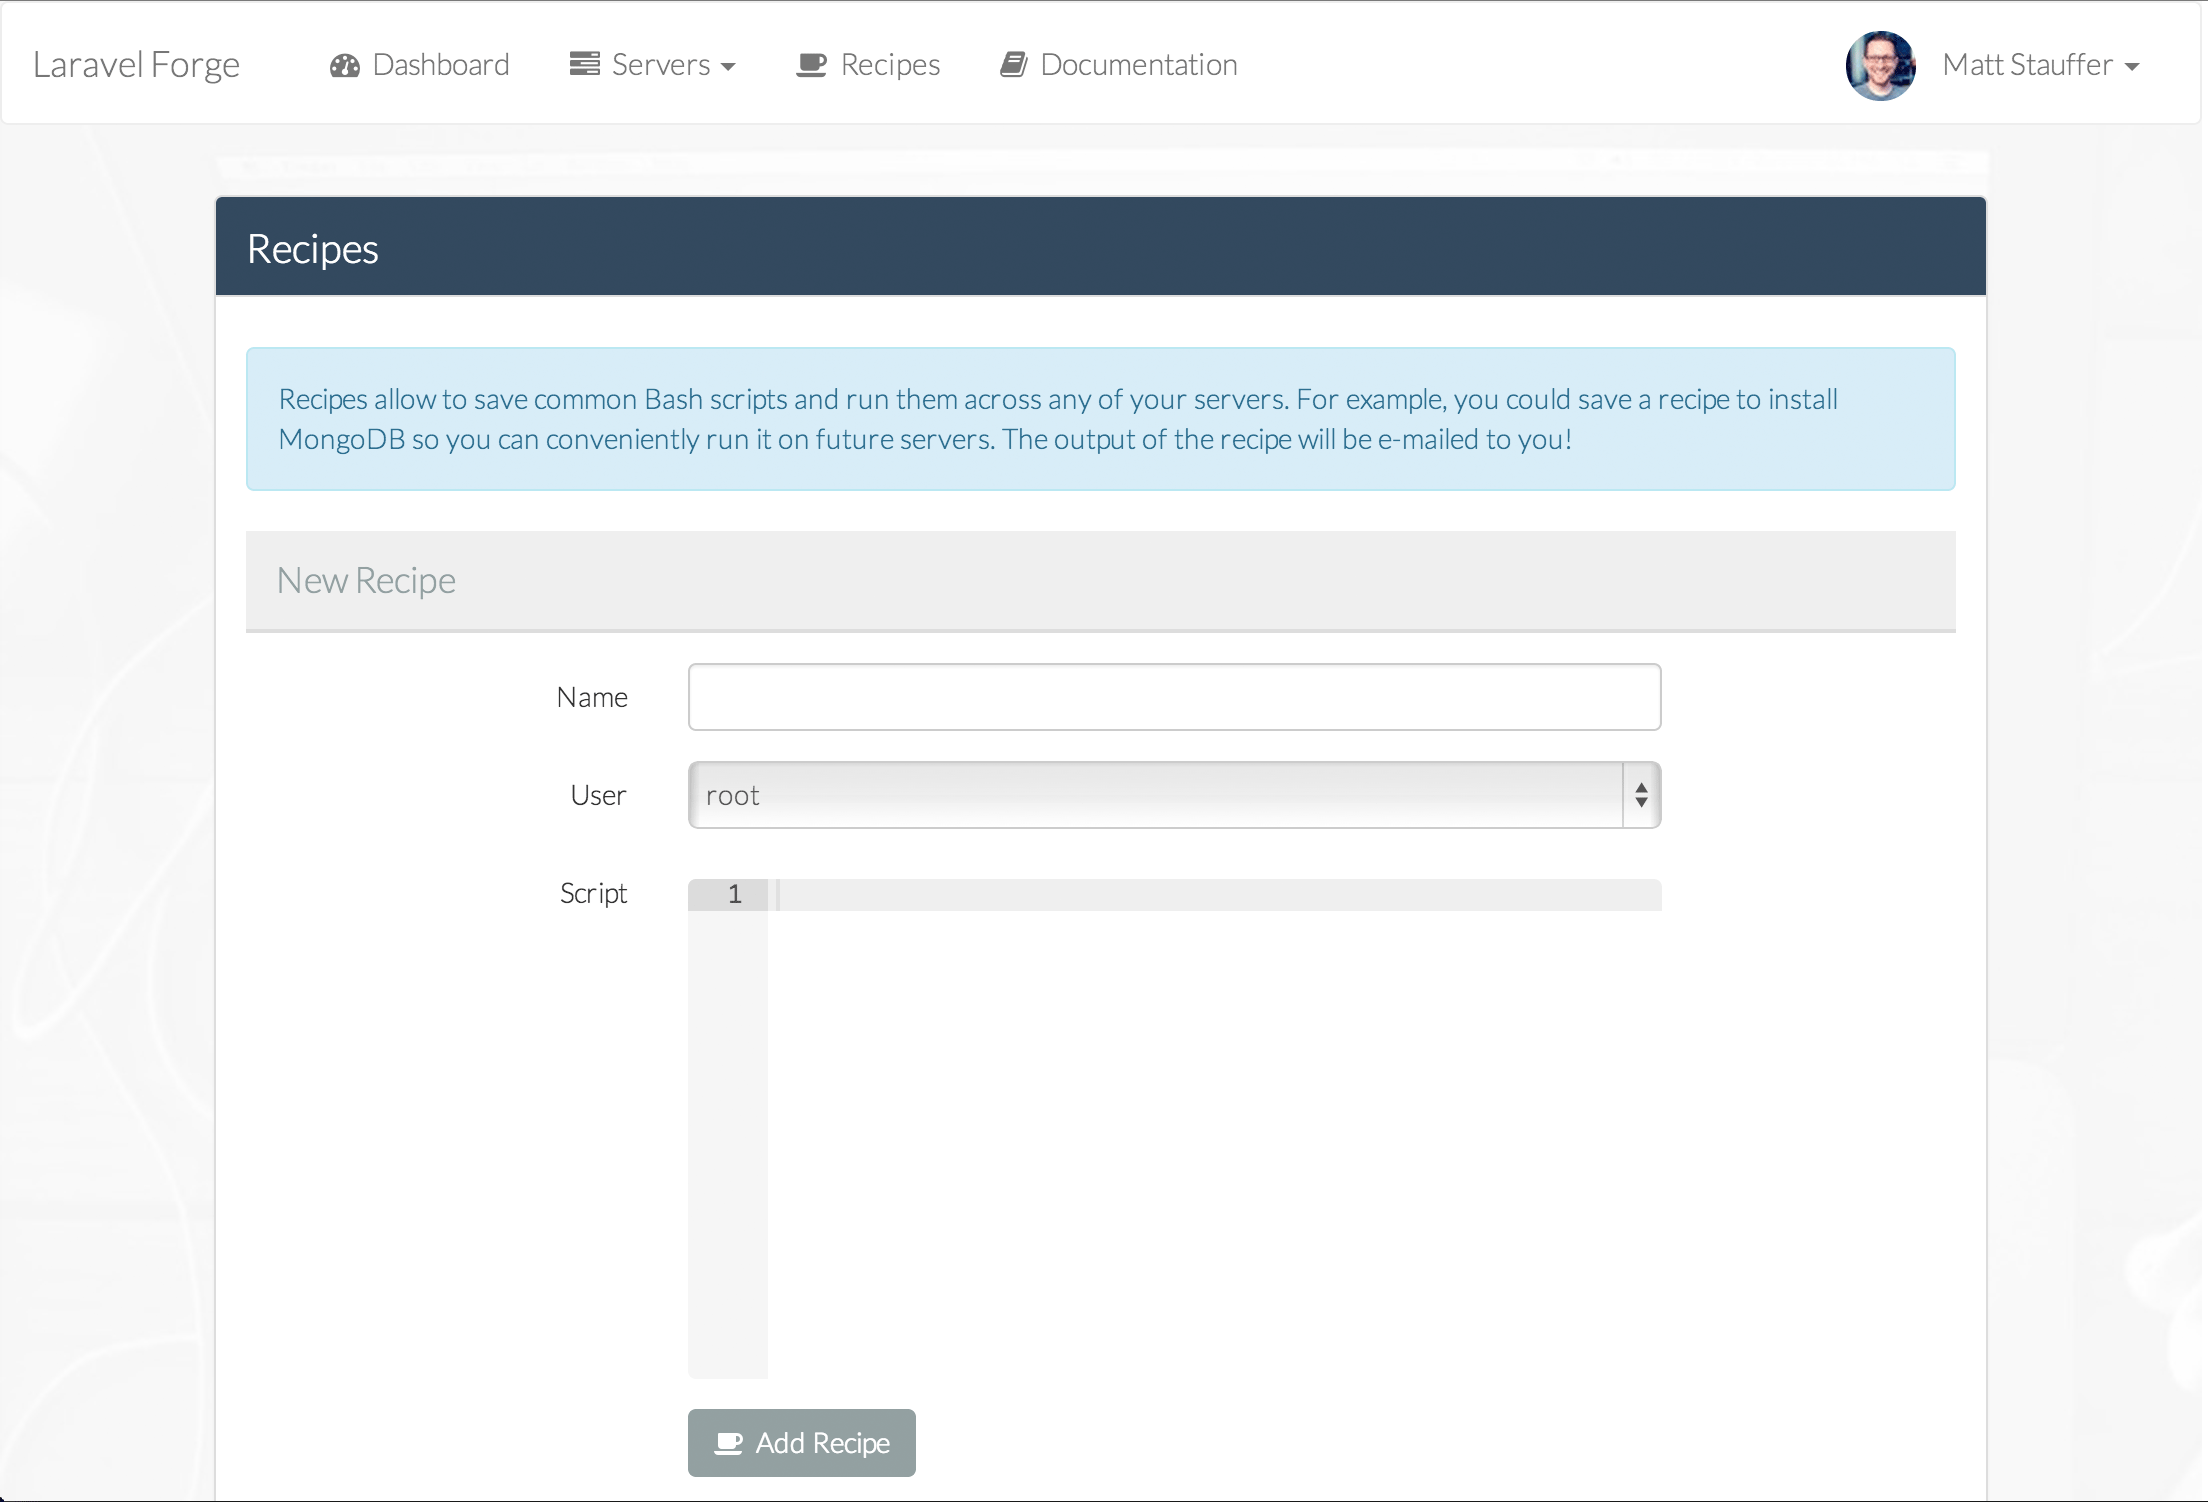
Forge also emails the output of the script to you after it's done running.
Workers and Crons
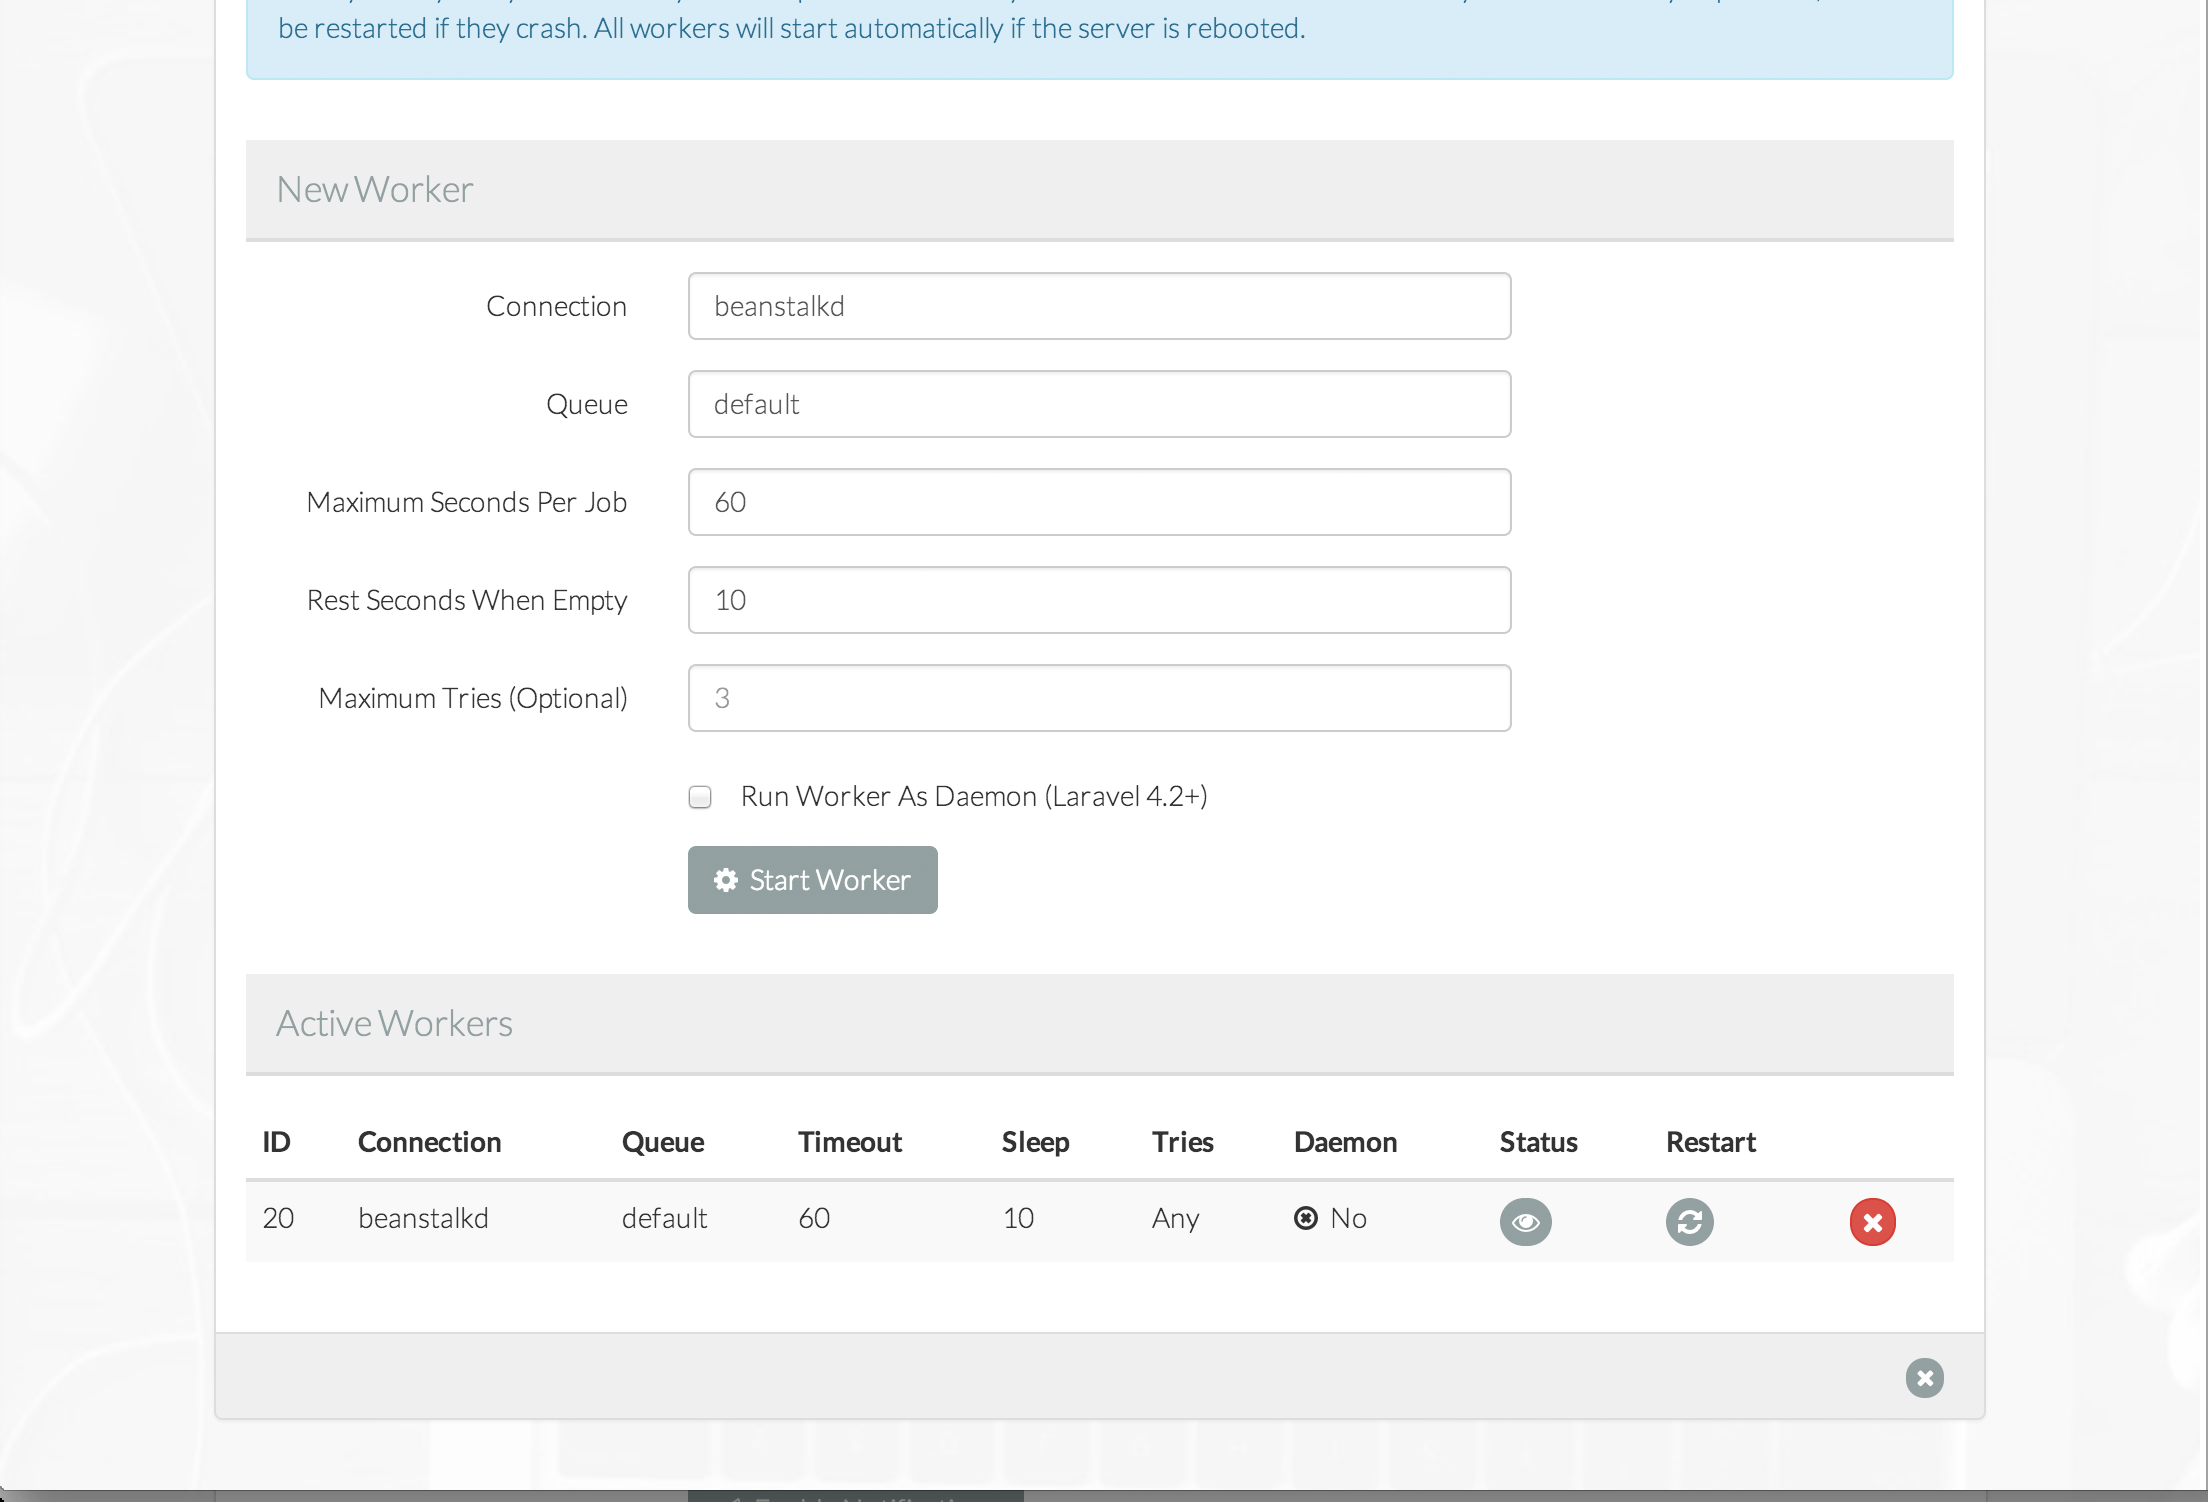
Forge has server tabs for Scheduler and Daemons and Site tabs for Queue Workers.
Scheduler allows you to create and delete cron jobs, and view logs from previous cron runs.
Daemons are long-running scripts managed by Supervisor.
Queue workers are Artisan queue workers, managed by Supervisor, based on beanstalkd.
Private Networking
Link your servers via private networking, create app & database server, etc. -- choose the servers you want to link together and Forge will automatically create private networks between your servers. Just configure your firewalls in the Forge GUI and they'll be up and talking together.
Archive Servers
If you want to use Forge to set up your account and then remove its access to your servers, just Archive your server and Forge will be disconnected. You can always un-archive it later if you need to use Forge again for something else.
Events & Monitoring
The bottom of your dashboard has a Recent Events section where you can see every significant event that hass happened across all of your servers.
The best way to monitor your apps, though, is to go to the Monitoring tab on a server and connect the server directly to your NewRelic and/or Papertrail accounts.
Notes on using Environment Variables for environment detection
Forge originally only used .env.ENVIRONMENTNAMEHERE.php files for environment variables, so there were some difficulties using env vars in your environment detection in bootstart/start.php. This is no longer the case.
This having been said, based on some of my experiences with queues and other services, I would highly recommend using hostnames to set your environment, not env vars. For example:
    $env = $app->detectEnvironment(array(
        'production' => array('your-forge-server-name-here'),
        'local' => array('homestead', '.local'),
    ));
This will set your homestead instance to be "local", many local dev machines (Mac and Linux, not sure about Windows) to automatically be "local", and set your Forge server as "production".
Notes on your IP address
Your site will, by default, be accessible via your public IP. Be careful that this doesn't leave you showing the depths of your site to the world--for example, if your detectEnvironment settings in bootstrap/start.php defaults to an environment with debug set to true, someone might be able to get a dev-style Whoops page by visiting your IP address, which would reveal config details about your app that you don't want public.
What makes Forge unique?
- Pricing: Forge's pricing is nearly nothing, and it's completely transparent. One price for unlimited access to Forge, and then just your normal pricing with your cloud host. The pricing on Forge is incredible, and honestly, we're almost stealing from Taylor by using this service at this price.
- Direct host access: You're allowing Forge to manage your pre-existing account with your cloud service provider (which you can log in to on your own); other services don't give you direct access to the Amazon account, for example, that is actually serving your content. This means more power and more flexibility
- Consistent configuration: Forge has a single, Laravel-optimized server configuration. You have flexibility from there, but it's definitely operating in the space of an "opinionated" default. Less time worrying about your environment, more time building something awesome
- Private networking: Forge allows you to easily network multiple servers, with one acting as a database, one for workers, one for serving the site, etc.--all from a simple-to-use interface. There's a ton of potential power here, all configurable through a simple GUI
Conclusion
Over the next few weeks I'll be posting how-to's about various aspects of using Forge: multiple domains and subdomains in one environment, advanced environment variables and environment detection, queues and daemons, PostgreSQL, and more.
Check back here, or follow me at @stauffermatt to see when I post more.
Did I make any mistakes, or do you have any questions? @stauffermatt for that too. Thanks!


Comments? I'm @stauffermatt on Twitter
Tags: laravel • forge
This is part of a series of posts on Laravel Forge:
-
May 15, 2014 | laravel, forge
-
May 16, 2014 | forge, laravel, papertrail
-
May 19, 2014 | laravel, forge, environment
-
May 23, 2014 | laravel, forge, queue, beanstalkd
-
Jun 2, 2014 | laravel, forge, cron
-
Jun 2, 2014 | forge, laravel, ssl
-
Jun 17, 2014 | forge, htpasswd, nginx
-
Jun 23, 2014 | laravel, forge, subdomains
-
Jul 9, 2014 | forge, laravel, recipes
-
Jul 25, 2014 | laravel, forge, aws, hosting
-
Sep 17, 2014 | laravel, forge
-
Sep 24, 2014 | laravel, forge
-
Sep 25, 2014 | laravel, forge, recipes
-
Dec 24, 2014 | forge, sculpin, fiveMinuteGeekShow
-
Dec 29, 2014 | laravel, forge, craft